In this tutorial, you will learn the basics of React by creating a very simple application. All the non-core things will be skipped in this tutorial.
Let’s focus on the basics!
Setup
You should use the simplest setup possible when starting with React: an HTML file that imports the React and the ReactDOM libraries through script tags.
This is how it looks:
<html>
<head>
<script src=”https://unpkg.com/react@16/umd/react.development.js”></script>
<script src=”https://unpkg.com/react-dom@16/umd/react-dom.development.js”></script>
<script src=”https://unpkg.com/[email protected]/babel.min.js”></script>
</head>
<body>
<div id=”root”></div>
<script type=”text/babel”>
/*
ADD REACT CODE HERE
*/
</script>
</body>
</html>
- The
<div>with the id of #root is the entry point for our app.This is the area where we will put our complete app. - The
<script type="text/babel"> tag in the body. We'll write our React code here.
class Hello extends React.Component {
render() {
return
Hello world!;
}
}
In our example, the component only has one method, which is render().
You’ll return a description of what you want React to display on the page in render(). The above example simply displays an h1 tag with the text Hello world! inside.
We also have to call ReactDOM.render() to get our tiny application to render on the screen:
ReactDOM.render(
<Hello />,
document.getElementById(“root”)
);
In this case, we are connecting our Hello component with the entry point for the app (<div id=”root”></div>).
The message is therefore: Hey React! Please render the Hello component with an id of root inside the DOM node!
It results in the following:

This HTML’ish syntax (<h1>and <Hello/>) is the JSX code I mentioned earlier. Although it’s not HTML, it’s a lot more powerful. Nevertheless, what you write there is turned into HTML tags in the DOM.
The next step is to get our app to handle data.
Handling data
There are two types of data in React: props and state. At first, it may seem confusing, but once you start using them, it will become easier for you.
A key difference is that the state is private and can be changed only within a component. Props are external and are not controlled by the component.The data is passed down from higher-level components, who also control the data.
The state of a component can only be changed internally. It cannot change its properties directly.
Let’s take a closer look at props first.
Props
The Hello component is completely static. No matter what, it displays the same message. However, one of the best things about React is that it enables us to create a component once and reuse it for a variety of uses. For example, sending out a different message.
To achieve this type of reusability, we’ll add props. This is how you pass props to a component:
ReactDOM.render(
<Hello message=”Good Morning” />,
document.getElementById(“root”)
);
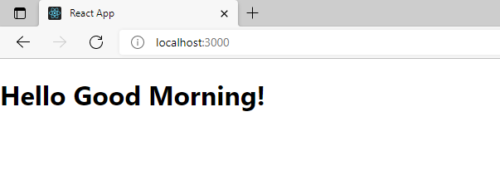
This prop is called a message and has the value “Good Morning“. In the Hello component, we can access this prop by referencing this.props.message, as follows:
class Hello extends React.Component {
render() {
return
Hello {this.props.message}!;
}
}
As a result, this is rendered on the screen:

The reason we’re writing {this.props.message} with curly braces is because we need to tell the JSX that we want to add a JavaScript expression. This is called escaping.
We now have a reusable component which can render whatever message we want on the page. Cool! But what if we want the component to be able to change its own data? We must use state instead!
State
In React, data is also stored in the component’s state. Unlike props – which cannot be edited – the state can be changed.
As a result, if you want your app’s data to change based on user interaction, it must be stored in the component’s state somewhere within the app.
Initializing state
Set this.state in the constructor() method of the class to initialize the state. Our state is an object with only one key, which is message in this case.
class Hello extends React.Component {
constructor(){
super();
this.state = {
message: “my friend (from state)!”
};
}
render() {
return
Hello {this.state.message}!;
}
}
The state is set before super() is called in the constructor because this is uninitialized before super() is called.
Changing the state
This.setState(), passing in the new state object as the argument, will let you change the state. We’ll do this in a method called updateMessage.
class Hello extends React.Component {
constructor(){
super();
this.state = {
message: “Good Morning (from state)!”
};
this.updateMessage = this.updateMessage.bind(this);
}
updateMessage() {
this.setState({
message: “Good Morning (from changed state)!”
});
}
render() {
return <h1>Hello {this.state.message}!</h1>;
}
}
Note: To make this work, we also had to bind the this keyword to the updateMessage method. Otherwise we couldn’t have accessed this in the method.
Event Handlers
In order to trigger the updateMessage() method, we need a button to click on.
So let’s add a button to the render() method:
render() {
return (
<div>
<h1>Hello {this.state.message}!</h1>
<button onClick={this.updateMessage}>Click me!</button>
</div>
)
}
The onClick event listener on this button is configured to take action when this event is triggered. When the event is triggered, the updateMessage method is called.
Here’s the entire component:
class Hello extends React.Component {
constructor(){
super();
this.state = {
message: “my friend (from state)!”
};
this.updateMessage = this.updateMessage.bind(this);
}
updateMessage() {
this.setState({
message: “my friend (from changed state)!”
});
}
render() {
return (
<div>
<h1>Hello {this.state.message}!</h1>
<button onClick={this.updateMessage}>Click me!</button>
</div>
)
}
}
Upon clicking the button, the updateMessage method calls this.setState(), changing the this.state.message value. Here’s how it works when we click the button:

Congrats! You now have a very basic understanding of the most important concepts in React.


