
In the previous section, you learned basic of React js tutorial. Now it’s time to learn this with details. Cover topics in this section as a mention below.
- Introduction
- Components
- Props
- Events
- Conditionals
1. React Introduction
What is React?
A JavaScript library created by Facebook, React is sometimes referred to as a frontend JavaScript framework.
React is a tool for creating UI components.
How does React Work?
In memory, React created a VIRTUAL DOM.
In order to do all the necessary manipulation, React creates a virtual DOM in memory before making any changes to the browser DOM.
Changes are only made when they are necessaryReact finds out what changes have been made, and changes only those that need to be changed.
2. Components
A component is similar to a function that returns HTML elements.
Components are independent and reusable pieces of code. They are similar to JavaScript functions, but they work in isolation and return HTML
There are two types of components: class components and function components.
In older React code bases, it is common to see Class components. Function components are now recommended as well as Hooks, which were added in React 16.8.
A React component’s name must begin with an upper case letter.
Make Your First Component
Class Component
Class components must include the extends React.Component statement. As a result of this statement, your component inherits React.Component and has access to React.Component’s functions.
A render() method is also required, which returns HTML.
Example:
Create a Class component called Bike

class Bike extends React.Component {
 render() {
   return <h2>Hi, I am a Bike!</h2>;
 }
}
Output:
Function Component
The same example is presented here, but using a Function component instead.
Class components return HTML and behave just like functional components, but function components require much less code and are easier to understand.
Example:
Create a Function component called Bike

function Bike() {
  return <h2>Hi, I am a Bike!</h2>;
}
Output:

3. Props
In React components, props are passed as arguments.Using HTML attributes, props are passed to components.
React Props are similar to JavaScript function arguments and HTML attributes. Properties are sent into components using the same syntax as HTML attributes:
Example:
Add a "brand" attribute to the Bike element:

const myelement = <Bike brand="Hero" />;
The component receives the argument as a props object:
Example:
Use the brand attribute in the component:

function Bike(props) {
  return <h2>I am a { props.brand }!</h2>;
}
Output:
Pass Data
Additionally, you can pass data between components using props as parameters.
Example:
Send the "brand" property from the Garage component to the Bike component:

function Bike(props) {
 return <h2>I am a { props.brand }!</h2>;
}

function Garage() {
  return (
    <>
      <h1>Who lives in my garage?</h1>
      <Bike brand="Hero" />
    </>
  );
}

ReactDOM.render(<Garage />, document.getElementById('root'));
Output:

If you want to send a variable instead of a string, just put the name of the variable inside curly brackets:
Example:
Create a variable named bikeName and send it to the Bike component:

function Bike(props) {
  return <h2>I am a { props.brand }!</h2>;
}

function Garage() {
  const bikeName = "Hero";
  return (
    <>
      <h1>Who lives in my garage?</h1>
      <Bike brand={ bikeName } />
    </>
  );
}

ReactDOM.render(<Garage />, document.getElementById('root'));
Output:
Or if it was an object:
Example:
Create an object named bikeInfo and send it to the Bike component:

function Bike(props) {
 return <h2>I am a { props.brand.model }!</h2>;
}

function Garage() {
  const bikeInfo = { name: "Hero", model: "Splendor" };
  return (
    <>
      <h1>Who lives in my garage?</h1>
      <Bike brand={ bikeInfo } />
    </>
  );
}

ReactDOM.render(<Garage />, document.getElementById('root'));
Output:
4. Events
React can perform actions based on user events, just like HTML DOM events.
There are the same events in React as in HTML: click, change, mouseover, etc.
Adding Events
The syntax for react events is camelCase:
Instead of onclick, use onClick.
React puts events inside curly braces:
Instead of onClick=”shoot()”, use onClick={shoot}.
React:
<button onClick={shoot}>Take the Shot!</button>
HTML:
<button onclick="shoot()">Take the Shot!</button>
Example:
Put the shoot function inside the Cricket component:
function Cricket() {
const shoot = () => {
alert("Great Shot!");
}
return (
<button onClick={shoot}>Take the shot!</button>
);
}
ReactDOM.render(, document.getElementById('root'));Output:
Passing Arguments
You can pass an argument to an event handler using an arrow function.
Example:
Using the arrow function, send the parameter "Hit!" to the shoot function:

function Cricket() {
  const shoot = (a) => {
    alert(a);
  }

  return (
    <button onClick={() => shoot("Hit!")}>Take the shot!</button>
  );
}

ReactDOM.render(<Cricket />, document.getElementById('root'));
Output:
React Event Object
React event handlers can access the React event that triggered the function.
Here, the event is “click”.
Example:
Arrow Function: Sending the event object manually:

function Cricket() {
  const shoot = (a, b) => {
    alert(b.type);
    /*
    'b' represents the React event that triggered the function,
    in this case the 'click' event
    */
  }

  return (
    <button onClick={(event) => shoot("Hit!", event)}>Take the shot!</button>
  );
}

ReactDOM.render(<Cricket />, document.getElementById('root'));
Output:
This will come in handy when we look at Form in a later chapter.
5. Conditionals
You can conditionally render components in React.
There are many ways to accomplish this.
if Statement
We can decide which component to render using the if JavaScript operator.
Example:
We'll use these two components:

function MissedWicket() {
  return <h1>Missed!</h1>;
}

function TakeWicket() {
  return <h1>Wicket!</h1>;
}
Example:
Now let's create another component that determines which component to render based on a condition:

function Wicket(props) {
  const isOut = props.isOut;
  if (isOut) {
    return <TakeWicket/>;
  }
  return <MissedWicket/>;
}

ReactDOM.render(
  <Wicket isOut={false} />,
  document.getElementById('root')
);
Output:
Try changing the isOut attribute to true: in ReactDOM.render section and notice output of above.
Logical && Operator
A React component can also be conditionally rendered by using the && operator.
Example:
In JSX, we can embed JavaScript expressions using curly braces:

function Garage(props) {
  const bikes = props.bikes;
  return (
    <>
      <h1>Garage</h1>
      {bikes.length > 0 &&
        <h2>
          You have {bikes.length} bikes in your garage.
        </h2>
      }
    </>
  );
}

const bikes = ['Bugatti', 'BMW', 'Harley Davidson’];
ReactDOM.render(
  <Garage bikes={bikes} />,
  document.getElementById('root')
);
Output:
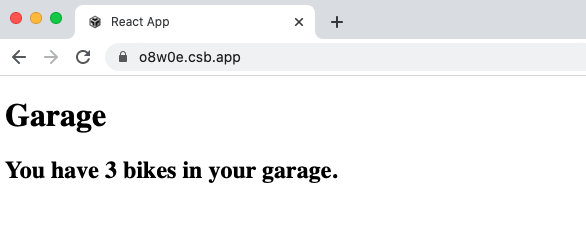
Expressions after && will be rendered if bikes.length equates to true.
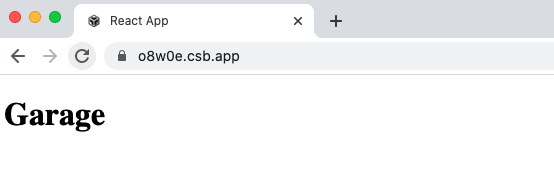
Let’s try emptying the bikes array:
Example:
const bikes = [];

ReactDOM.render(
  <Garage bikes={bikes} />,
  document.getElementById('root')
);
Output:
Ternary Operator
It is also possible to use ternary operators to conditionally render elements.
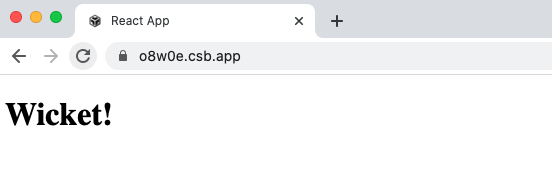
condition ? true : falseLet’s return to the out example.
TakeWicket component, otherwise return the MissedWicket component:

function Wicket(props) {
  const isOut = props.isOut;
  return (
    <>
      { isOut ? <TakeWicket/> : <MissedWicket/> }
    </>
  );
}

ReactDOM.render(
  <Wicket isOut={false} />,
  document.getElementById('root')
);
Output:
We hope you would have enjoyed this blog.
In the next session, you will learn about the class components.