
In the previous section, we completed discussion about react functional component with hooks. Now we discuss other advance features of react. Cover topics in this section as a mention below.
- List
- Forms
- Router
- MemoList
1. Lists
You will render lists in React with some type of loop.
The JavaScript map() array method is generally the most popular method:
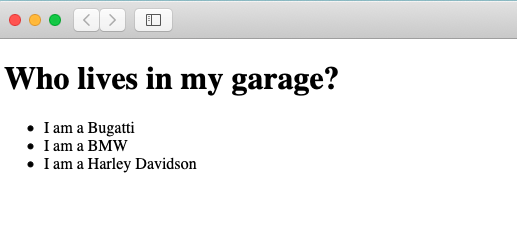
Example:
Let's render our bike's bikes:

function Bike(props) {
  return <li>I am a { props.brand }</li>;
}

function Garage() {
  const bikes = ['Bugatti', 'BMW', 'Harley Davidson’];
  return (
    <>
      <h1>Who lives in my garage?</h1>
      <ul>
        {bikes.map((bike) => <Bike brand={bike} />)}
      </ul>
    </>
  );
}

ReactDOM.render(<Garage />, document.getElementById('root'));
Output:

Run this code in your create-react-app and it will work however you will receive a warning that there is no “key” provided for the list items.
Keys
React keeps track of elements using keys. This way, only the updated or removed item will be re-rendered instead of the entire list.
It is crucial that each sibling’s key be distinct, but it is possible to duplicate it globally.
Keys are generally unique identifiers assigned to each item.
If you don't have a unique identifier for each item, you can use array indexes.
Example: As an example, let's include keys in our previous example: function Bike(props) { return <li>I am a { props.brand }</li>; } function Garage() { const bikes = [ {id: 1, brand: 'Bugatti'}, {id: 2, brand: 'BMW'}, {id: 3, brand: 'Harley Davidson’} ]; return ( <> <h1>Who lives in my garage?</h1> <ul> {bikes.map((bike) => <Bike key={bike.id} brand={bike.brand} />)} </ul> </> ); } ReactDOM.render(<Garage />, document.getElementById('root'));Output:
2. Forms
Users interact with Web pages using React’s forms just like they would in HTML.
Adding Forms in React
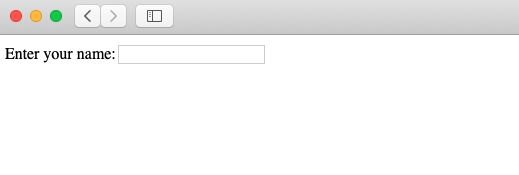
With React, you add a form like any other element:
Example:
Add a form for users to enter their names:

function MyForm() {
  return (
    <form>
      <label>Enter your name:
        <input type="text" />
      </label>
    </form>
  )
}

ReactDOM.render(<MyForm />, document.getElementById('root'));
Output:

The form will submit and the page will refresh as normal.
In general, this is not what we want to happen with React.
By using React, we can prevent this default behavior.
Handling Forms
Handling forms is about how you handle the data when it changes value or gets submitted.
The HTML DOM is usually responsible for handling form data.
In React, form data is typically handled by components.
When the data is handled by the components, all the data is stored in the component state.
The onChange attribute lets you add event handlers to control changes.
By using the useState Hook, we can keep track of every input value and provide a “single source of truth” for the entire application.
For more information on Hooks, see the React Hooks section.
Example:
To manage input, use the onChange hook:

import { useState } from "react";
import ReactDOM from 'react-dom';

function MyForm() {
  const [name, setName] = useState("");

  return (
    <form>
      <label>Enter your name:
        <input
          type="text"
          value={name}
          onChange={(e) => setName(e.target.value)}
        />
      </label>
    </form>
  )
}

ReactDOM.render(<MyForm />, document.getElementById('root'));
Output:
Submitting Forms
In addition to adding an event handler in the onSubmit attribute, you can control the submit action as follows:
Example:
In the onSubmit attribute, add a button and an event handler:

import { useState } from "react";
import ReactDOM from 'react-dom';

function MyForm() {
  const [name, setName] = useState("");
  const handleSubmit = (event) => {
    event.preventDefault();
    alert(`The name you entered was: ${name}`)
  }

  return (
    <form onSubmit={handleSubmit}>
      <label>Enter your name:
        <input
          type="text"
          value={name}
          onChange={(e) => setName(e.target.value)}
        />
      </label>
      <input type="submit" />
    </form>
  )
}

ReactDOM.render(<MyForm />, document.getElementById('root'));
Output:

Multiple Input Fields
By adding a name attribute to each element, you can control the value of more than one input field.
Initially, we will create an empty object.
Use the event.target.name and event.target.value syntax to access the fields of the event handler.
Use square brackets [bracket notation] around the property name to update the state.
Example:
Write a form with two input fields:

import { useState } from "react";
import ReactDOM from "react-dom";

function MyForm() {
  const [inputs, setInputs] = useState({});
  const handleChange = (event) => {
    const name = event.target.name;
    const value = event.target.value;
    setInputs(values => ({...values, [name]: value}))
  }

  const handleSubmit = (event) => {
    event.preventDefault();
    alert("Name: " + inputs?.username + "\nAge: " + inputs?.age);
  }

  return (
    <form onSubmit={handleSubmit}>
      <label>Enter your name:
      <input
        type="text"
        name="username"
        value={inputs.username || ""}
        onChange={handleChange}
      />
      </label>
      <label>Enter your age:
        <input
          type="number"
          name="age"
          value={inputs.age || ""}
          onChange={handleChange}
        />
        </label>
        <input type="submit" />
    </form>
  )
}

ReactDOM.render(<MyForm />, document.getElementById('root'));
Output:

Notes: For both input fields, we use the same event handler function. We could write one handler for each, but this leads to cleaner code and is the preferred way in React.
Textarea
In React, the textarea element is slightly different from ordinary HTML.
An HTML textarea contained the text between the start tag <textarea> and the end tag </textarea>.
<textarea>
The content of the textarea.
</textarea>
The value of a textarea is stored in the value attribute in React. In order to manage the textarea value, we will use the useState Hook:
Example:
A simple textarea with some content:

import { useState } from "react";
import ReactDOM from "react-dom";

function MyForm() {
  const [textarea, setTextarea] = useState(
    "The content of a textarea goes in the value attribute"
  );

  const handleChange = (event) => {
    setTextarea(event.target.value)
  }

  return (
    <form>
      <textarea value={textarea} onChange={handleChange} />
    </form>
  )
}

ReactDOM.render(<MyForm />, document.getElementById('root'));
Output:

Select
There is also a difference between a drop down list and a select box in React.
In HTML, the selected value of the drop-down list is defined by its selected attribute:
HTML:

<select>
  <option value="Bugatti">Bugatti</option>
  <option value="BMW" selected>BMW</option>
 <option value="Harley Davidson">Harley Davidson</option>
</select>
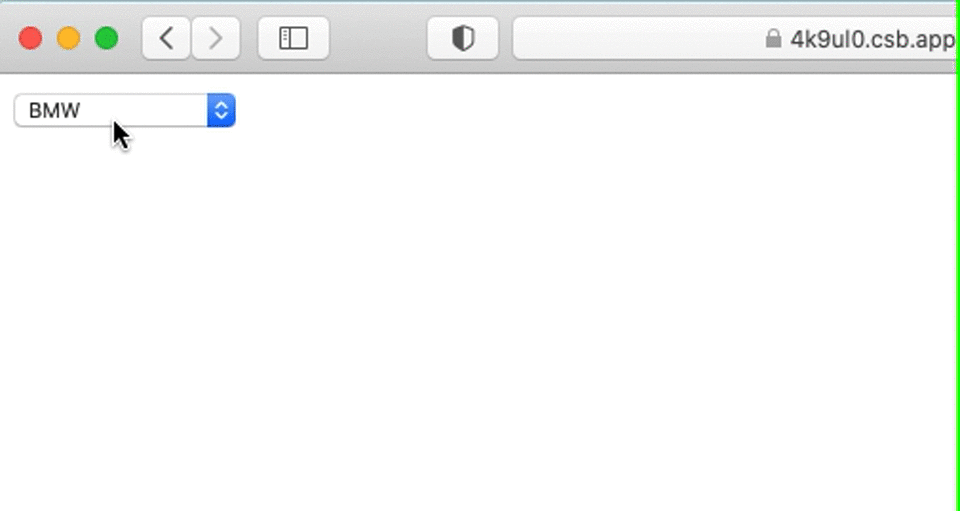
In React, the selected value is defined by a value attribute on the select tag:
Example:
A simple select box, where the selected value "BMW" is initialized in the constructor:

function MyForm() {
  const [myBike, setMyBike] = useState("BMW");
  const handleChange = (event) => {
    setMyBike(event.target.value)
  }

  return (
    <form>
      <select value={myBike} onChange={handleChange}>
        <option value="Bugatti">Bugatti</option>
        <option value="BMW">BMW</option>
        <option value="Harley Davidson">Harley Davidson</option>
      </select>
    </form>
  )
}
Output:
React is able to handle all input elements in the same way with these slight changes to <textarea> and <select>.
3. Router
The Create React App does not include page routing.
One of the most popular solutions is Router.
Add Router
To add Router in your application, run this in the terminal from the root directory of the application:
npm i -D react-router-domNote: This tutorial uses Router v6.
If you are upgrading from v5, you will need to use the @latest flag:
npm i -D react-router-dom@latestFolder Structure
First, let’s create a file structure for an application with multiple page routes.
We’ll create a folder named pages within the src folder:
src\pages\:
- Layout.js
- Home.js
- Blogs.js
- Contact.js
- NoPage.js
The files will each contain a very basic React component.
Basic Usage
We are now going to use our Router in our index.js file.
Example:
Use React Router to route to pages based on URL:

index.js:
import ReactDOM from "react-dom";
import { BrowserRouter, Routes, Route } from "react-router-dom";
import Layout from "./pages/Layout";
import Home from "./pages/Home";
import Blogs from "./pages/Blogs";
import Contact from "./pages/Contact";
import NoPage from "./pages/NoPage";

export default function App() {
  return (
    <BrowserRouter>
      <Routes>
        <Route path="/" element={<Layout />}>
          <Route index element={<Home />} />
          <Route path="blogs" element={<Blogs />} />
          <Route path="contact" element={<Contact />} />
          <Route path="*" element={<NoPage />} />
        </Route>
      </Routes>
    </BrowserRouter>
  );
}

ReactDOM.render(<App />, document.getElementById("root"));
Output:
Example Explained
First, we wrap our content with <BrowserRouter>.
Next, we define our <Routes>.Each application can have multiple routes.This example uses only one.
<Routes> may be nested. This first <Route> has a path of / and renders the Layout component.
Nested <Route>s inherit and add to the parent route. As a result, the blogs path becomes /blogs after being combined with the parent path.
The Home component route does not have a path, but it does have an index attribute. This route is the default route for the parent route, which is /.
If the path is set to *, it will act as a catch-all for any undefined URLs. A 404 error page is a great example of this.
Pages / Components
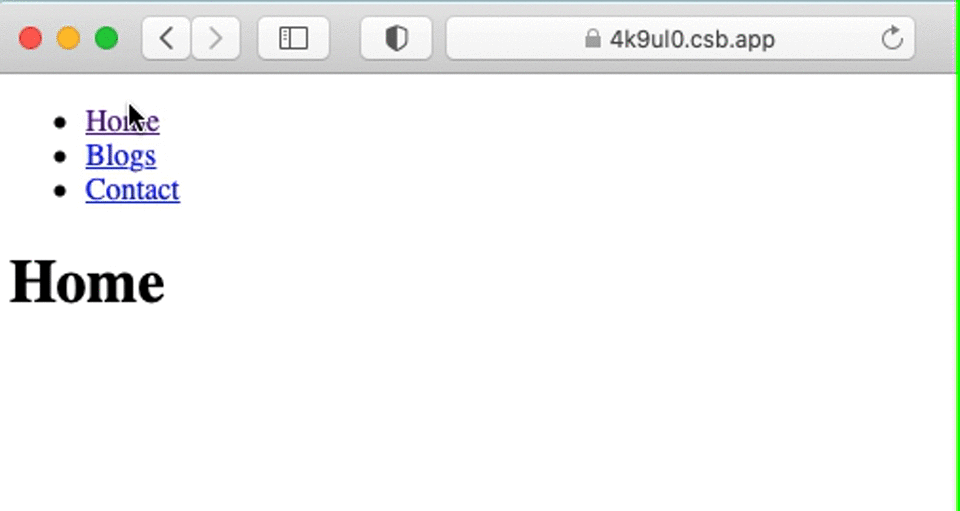
Layout contains <Outlet> and <Link> elements.
The <Outlet> renders the current route.
The <Link> element is used to set the URL and keep track of browsing history.
When linking to an internal path, we will use <Link> instead of <a href=””>.
In a “layout route”, content common to all pages is inserted, for instance, a navigation menu.
Layout.js:

import { Outlet, Link } from "react-router-dom";
const Layout = () => {
  return (
    <>
      <nav>
        <ul>
          <li>
            <Link to="/">Home</Link>
          </li>
          <li>
            <Link to="/blogs">Blogs</Link>
          </li>
          <li>
            <Link to="/contact">Contact</Link>
          </li>
        </ul>
      </nav>
      <Outlet />
    </>
  )
};

export default Layout;
Home.js:

const Home = () => {
  return <h1>Home</h1>;
};

export default Home;
Blogs.js:

const Blogs = () => {
  return <h1>Blog Articles</h1>;
};

export default Blogs;
Contact.js:

const Contact = () => {
  return <h1>Contact Me</h1>;
};

export default Contact;
NoPage.js:

const NoPage = () => {
  return <h1>404</h1>;
};

export default NoPage;
4. Memo
The memo will cause React to skip rendering a component if its props have not changed.
This can improve performance.
For more information on Hooks, see the React Hooks section.
Problem
Here, the Todos component renders even though the todos have not changed.
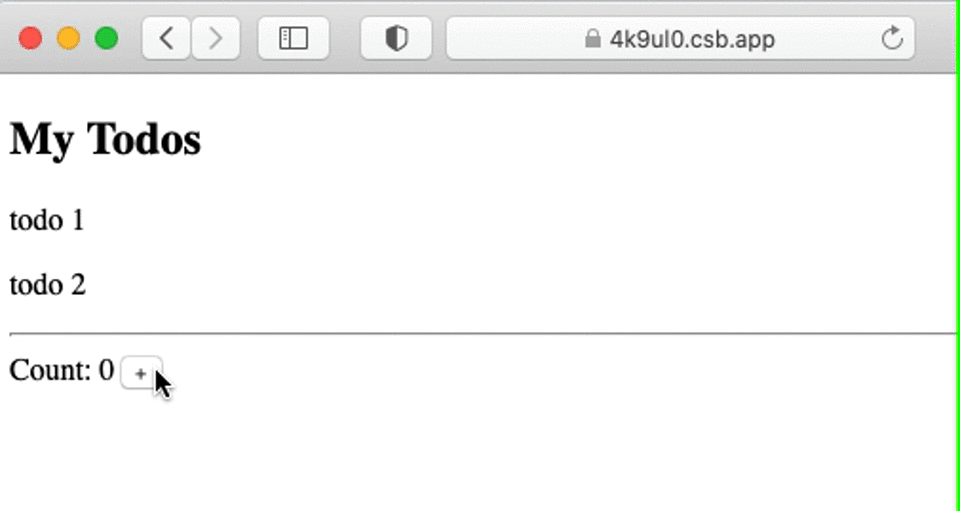
Example:
index.js:

import { useState } from "react";
import ReactDOM from "react-dom";
import Todos from "./Todos";

const App = () => {
  const [count, setCount] = useState(0);
  const [todos, setTodos] = useState(["todo 1", "todo 2"]);

  const increment = () => {
    setCount((c) => c + 1);
  };

  return (
    <>
      <Todos todos={todos} />
      <hr />
      <div>
        Count: {count}
        <button onClick={increment}>+</button>
      </div>
    </>
  );
};

ReactDOM.render(<App />, document.getElementById('root'));
Todos.js:

const Todos = ({ todos }) => {
  console.log("child render");
  return (
    <>
      <h2>My Todos</h2>
      {todos.map((todo, index) => {
        return <p key={index}>{todo}</p>;
      })}
    </>
  );
};

export default Todos;
Output:

The Todos component re-renders when you click the increment button.
This component could cause performance issues if it was complex.
Solution
We can fix this by using memo.
Keep Todos components from needlessly re-rendering by using memoto.
In the memo, wrap the Todos component export:
Example:
index.js:

import { useState } from "react";
import ReactDOM from "react-dom";
import Todos from "./Todos";

const App = () => {
  const [count, setCount] = useState(0);
  const [todos, setTodos] = useState(["todo 1", "todo 2"]);

  const increment = () => {
    setCount((c) => c + 1);
  };

  return (
    <>
      <Todos todos={todos} />
      <hr />
      <div>
        Count: {count}
        <button onClick={increment}>+</button>
      </div>
    </>
  );
};

ReactDOM.render(<App />, document.getElementById('root'));
Todos.js:
import { memo } from "react";

const Todos = ({ todos }) => {
  console.log("child render");
  return (
    <>
      <h2>My Todos</h2>
      {todos.map((todo, index) => {
        return <p key={index}>{todo}</p>;
      })}
    </>
  );
};

export default memo(Todos);
Output:
Todos components now only re-render when the props they receive are updated.