
In the previous section, we learned about the basics of Vuejs. Now it is time to dive deeper into the Vuejs. You will become an expert in Vuejs if you follow this tutorial from beginning to end. This section covers topics described below with full details and examples.
- Instances
- Template
- Components
1) Instance
The first thing we need to do is create an instance of Vue, which is called the root Vue instance.
Syntax:
var app = new Vue({
   // options
})
In order to understand what the Vue constructor needs to contain, let’s look at an example.
<html>
   <head>
      <title>VueJs Instance</title>
      <script type = "text/javascript" src = "js/vue.js"></script>
   </head>
   <body>
      <div id = "vue_det">
         <h1>Firstname : {{firstname}}</h1>
         <h1>Lastname : {{lastname}}</h1>
         <h1>{{mydetails()}}</h1>
      </div>
      <script type = "text/javascript" src = "js/vue_instance.js"></script>
   </body>
</html>
vue_instance.js
var  vm = new Vue({
   el: '#vue_det',
   data: {
      firstname : "Tom",
      lastname  : "Cruise",
      address    : "USA"
   },
   methods: {
      mydetails : function() {
         return "I am "+this.firstname +" "+ this.lastname;
      }
   }
})
There is a parameter called el in Vue. We use it to get the element’s DOM id. As you can see above, our id is #vue_det. There is a div element in .html with this id.
<div id = "vue_det"></div>
We will now affect only the div element and not the rest of the page.
We have now defined the data object. It contains three values: firstname, lastname, and address.
This is also assigned inside the div. For instance,
<div id = "vue_det">
   <h1>Firstname : {{firstname}}</h1>
   <h1>Lastname : {{lastname}}</h1>
</div>
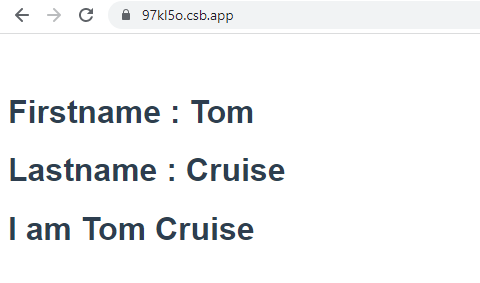
The Firstname : {{firstname}} value will be replaced inside the interpolation, i.e. {{}} with the value assigned in the data object, i.e. Tom. The same goes for the last name.
Next, we have methods that define the function mydetails and a return value. It is defined inside the div as
<h1>{{mydetails()}}</h1>As a result, within {{} } mydetails is called. In the Vue instance, the value will be printed inside {{}}. For reference, check the output.
Output:
In order to pass options to the Vue constructor, we must pass data, template, element to mount on, methods, and callbacks.
We can now look at the options that we need to pass to the Vue.
#data − A data type like this can be either an object or a function. By making its properties getters and setters, Vue makes it reactive.
Let’s examine how the data in the options are passed.
Example:

<html>
   <head>
      <title>Introduction</title>
      <script type = "text/javascript" src = "js/vue.js"></script>
   </head>

   <body>
      <script type = "text/javascript">
         var _obj = { fname: "Johnny", lname: "Depp"}
             // direct instance creation
         var vm = new Vue({
            data: _obj
         });
         console.log(vm.fname);
         console.log(vm.$data);
         console.log(vm.$data.fname);
      </script>
   </body>
</html>
Output: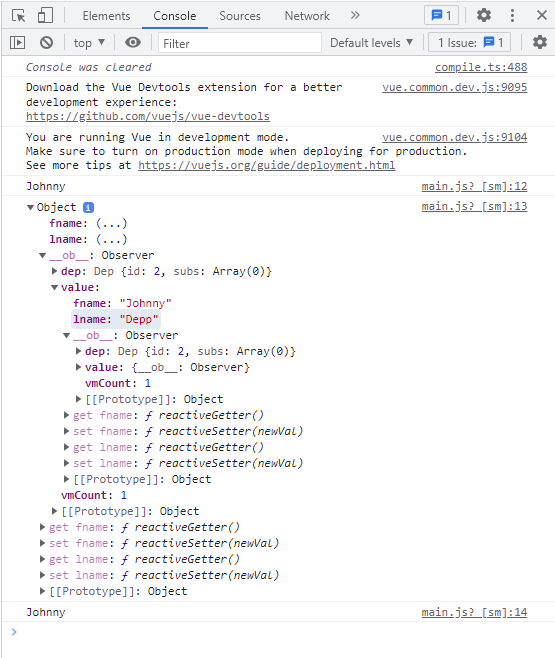
console.log(vm.fname); // prints Johnny
console.log(vm.$data); prints the full object as shown above
console.log(vm.$data.fname); // prints Johnny
If there is a component, the data object has to be referred from a function as shown in the following code.
<html>
<head>
<title>VueJs Introduction</title>
<script type = "text/javascript" src = "js/vue.js"></script>
</head>
<body>
<script type = "text/javascript">
var _obj = { fname: "Johnny", lname: "Deep"};
// direct instance creation
var vm = new Vue({
data: _obj
});
console.log(vm.fname);
console.log(vm.$data);
console.log(vm.$data.fname);
// must use function when in Vue.extend()
var Component = Vue.extend({
data: function () {
return _obj
}
});
var myComponentInstance = new Component();
console.log(myComponentInstance.lname);
console.log(myComponentInstance.$data);
</script>
</body>
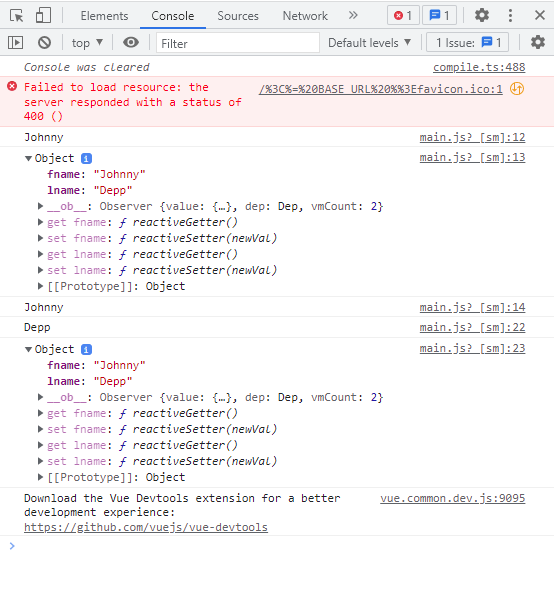
</html>As shown above, a component’s data is a function used by Vue.extend. Data is a function. For example,
data: function () {
   return _obj
}
In order to refer to the data from the component, we need to create an instance of it. For example,
var myComponentInstance = new Component();
We need to do the same thing with the data as we did with the parent component above. For example.
console.log(myComponentInstance.lname);
console.log(myComponentInstance.$data);
Following are the details displayed in the browser.
Example 1:

Vue.component('props-demo-simple', {
   props: ['size', 'myMessage']
})
Example 2:
Vue.component('props-demo-advanced', {
props: {
// just type check
height: Number,
// type check plus other validations
age: {
type: Number,
default: 0,
required: true,
validator: function (value) {
return value >= 0
}
}
}
})propsData – Used for unit testing.Type − array of string. For example, { [key: string]: any }. It must be passed when creating a Vue instance.Example:
var Comp = Vue.extend({
props: ['msg'],
template: '<div>{{ msg }}</div>'
})
var vm = new Comp({
propsData: {
msg: 'hello'
}
})Computed − Type: { [key: string]: Function | { get: Function, set: Function } }Example:
<html>
<head>
<title>VueJs Introduction</title>
<script type = "text/javascript" src = "js/vue.js"></script>
</head>
<body>
<script type = "text/javascript">
var vm = new Vue({
data: { a: 2 },
computed: {
// get only, just need a function
aSum: function () {
return this.a + 2;
},
// both get and set
aSquare: {
get: function () {
return this.a*this.a;
},
set: function (v) {
this.a = v*2;
}
}
}
})
console.log(vm.aSquare); // -> 4
vm.aSquare = 3;
console.log(vm.a); // -> 6
console.log(vm.aSum); // -> 8
</script>
</body>
</html>Computed has two functions aSum and aSquare.
Function aSum just returns this.a+2. Function aSquare returns two functions, get and set.
Variable vm is a Vue instance that calls aSquare and aSum. Similarly, vm.aSquare = 3 calls the set function from aSquare and vm.aSquare calls the get function.
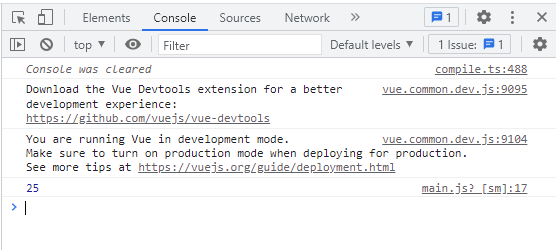
Methods − Methods must be included with the Vue instance, as shown in the following code. We can access these methods using the Vue object.
<html>
   <head>
      <title>Introduction</title>
      <script type = "text/javascript" src = "js/vue.js"></script>
   </head>

   <body>
      <script type = "text/javascript">
         var vm = new Vue({
            data: { a: 5 },
            methods: {
               asquare: function () {
                  this.a *= this.a;
               }
            }
         })
         vm.asquare();
         console.log(vm.a); // 25
      </script>
   </body>
</html>
In Vue, methods are part of the constructor. The value of the property a is updated in the asquare function when we call the method using the Vue object vm.asquare (). The value of a is changed from 1 to 25, as can be seen in the following browser console.
2) Template
We will learn how to get an output on the screen in HTML template form.
Let’s look at an example and see the results in the browser to better understand this.
<html>
   <head>
      <title>Instance</title>
      <script type = "text/javascript" src = "js/vue.js"></script>
   </head>

   <body>
      <div id = "vue_det">
         <h1>Firstname : {{firstname}}</h1>
         <h1>Lastname : {{lastname}}</h1>
         <div>{{htmlcontent}}</div>
      </div>
      <script type = "text/javascript" src = "js/vue_template.js"></script>
   </body>
</html>
vue_template.js
var vm = new Vue({
   el: '#vue_det',
   data: {
      firstname : "Tom",
      lastname  : "Cruise",
      htmlcontent : "<div><h1>Vue Js Template</h1></div>"
   }
})
Now, suppose we want to display html content on the page. Using double curly brackets with interpolation, we will get this in the browser.
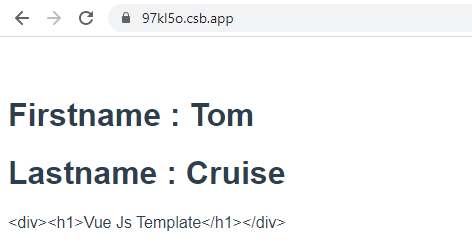
As we can see, HTML content is displayed the same way it is in the htmlcontent variable, but we want it to be displayed in a proper HTML content format on the browser.
To do this, we will use the v-html directive. The moment we assign the v-html directive to the html element, VueJS knows that the element should be output as HTML. Let’s add the v-html directive to the .html file and see the difference.
<html>
   <head>
      <title>Instance</title>
      <script type = "text/javascript" src = "js/vue.js"></script>
   </head>
   <body>
      <div id = "vue_det">
         <h1>Firstname : {{firstname}}</h1>
         <h1>Lastname : {{lastname}}</h1>
         <div v-html = "htmlcontent"></div>
      </div>
      <script type = "text/javascript" src = "js/vue_template.js"></script>
   </body>
</html>
In order to display the HTML content, we no longer need the double curly brackets. Instead, we have used v-html = “htmlcontent” where htmlcontent is defined inside the JS file as follows −
var vm = new Vue({
   el: '#vue_det',
   data: {
      firstname : "Tom",
      lastname  : "Cruise",
      htmlcontent : "<div><h1>Vue Js Template</h1></div>"
   }
})
The output in the browser is as follows −
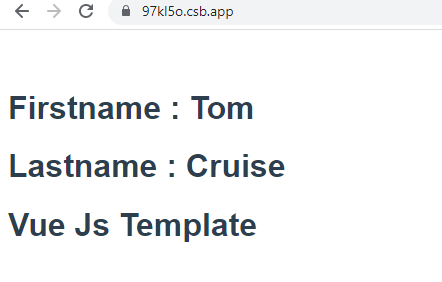
In the browser, the content is added in the same way as in the .js file : “<div><h1>Vue Js Template</h1></div>”.
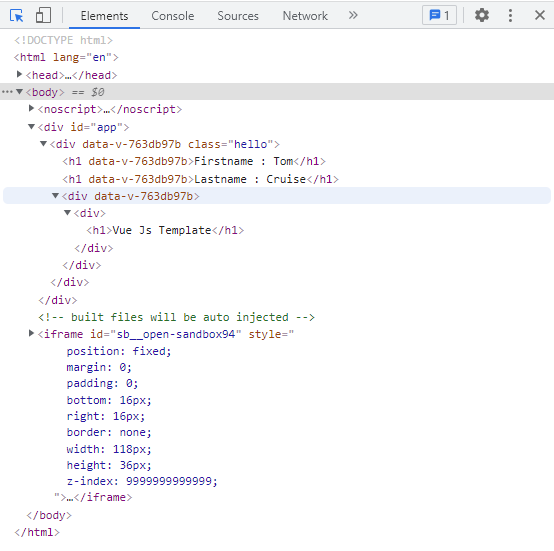
Let’s examine the inspect element in the browser.
We’ve seen how to add an HTML template to the DOM. Now, let’s add attributes to the existing elements.
Imagine we have an image tag in the HTML file and we want to assign src, which is part of Vue.
Example:

<html>
   <head>
      <title>VueJs Instance</title>
      <script type = "text/javascript" src = "js/vue.js"></script>
   </head>

   <body>
      <div id = "vue_det">
         <h1>Firstname : {{firstname}}</h1>
         <h1>Lastname : {{lastname}}</h1>
         <div v-html = "htmlcontent"></div>
         <img src = "" width = "250" height = "250" />
      </div>
      <script type = "text/javascript" src = "js/vue_template1.js"></script>
   </body>
</html>
In the img tag above, the src is blank. We need to add the src from vuejs. Let’s take a look at how to do it. We will store the image src in the data object as follows −
var vm = new Vue({
   el: '#vue_det',
   data: {
      firstname : "Tom",
      lastname  : "Cruise",
      htmlcontent : "<div><h1>Vue Js Template</h1></div>",
      imgsrc : "images/img.jpg"
   }
})
The following screenshot illustrates what will happen if the src is assigned as follows
<img src = “{{imgsrc}}” width = “250” height = “250” />
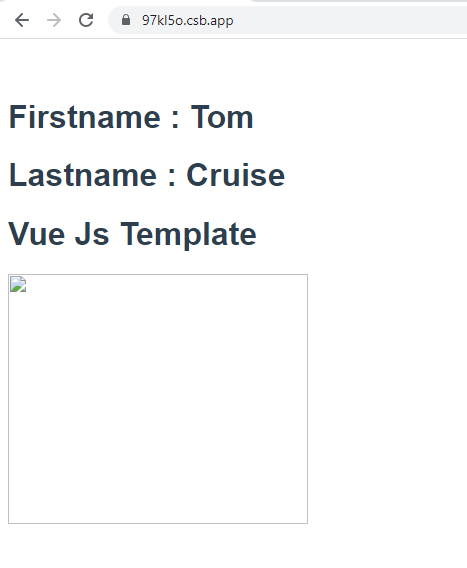
<html>

   <head>

      <title>Instance</title>

      <script type = "text/javascript" src = "js/vue.js"></script>

   </head>

   <body>

      <div id = "vue_det">

         <h1>Firstname : {{firstname}}</h1>

         <h1>Lastname : {{lastname}}</h1>

         <div v-html = "htmlcontent"></div>

         <img v-bind:src = "imgsrc" width = "250" height = "250" />

      </div>

      <script type = "text/javascript" src = "js/vue_template1.js"></script>

   </body>

</html>
In our case, we need to prefix src with v-bind:src = ”imgsrc” and the variable name with src.Following is the output in the browser.

Let’s see how the src looks with v-bind.

This screenshot shows the src is assigned without any vueJS properties.
3) Components
Vue Components are one of the most important features of VueJS, which creates custom elements that can be reused in HTML.
Let’s create an example component to better understand how components work with VueJS.
Example:

<html>
   <head>
      <title>Instance</title>
      <script type = "text/javascript" src = "js/vue.js"></script>
   </head>

   <body>
      <div id = "component_test">
         <testcomponent></testcomponent>
      </div>
      <div id = "component_test1">
         <testcomponent></testcomponent>
      </div>
      <script type = "text/javascript" src = "js/vue_component.js"></script>
   </body>
</html>
vue_component.js
Vue.component('testcomponent',{
   template : '<div><h1>This is coming from component</h1></div>'
});

var vm = new Vue({
   el: '#component_test'
});

var vm1 = new Vue({
   el: '#component_test1'
});
In the .html file, we have created two divs with the id component_test and component_test1. Both Vue instances are created with the div ids in the .js files above. Our common component can be used with both view instances.
Here is how to create a component.
Vue.component('nameofthecomponent',{ // options});When a component is created, its name becomes a custom element, which can also be used inside the Vue instance element, i.e. inside the div with ids component_test and component_test1.
The name of the component was set to test component in the .js file, and the same name is used as the custom element inside the divs.
Example:

<div id = "component_test">
   <testcomponent></testcomponent>
</div>

<div id = "component_test1">
   <testcomponent></testcomponent>
</div>
Using the component created in .js, we have assigned the HTML code to a template. It is a way to register a global component, which can become an integral part of a vue instance, as shown in the following script.Vue.component('testcomponent',{
template : '<div><h1>This is coming from components</h1></div>'
});On execution, the same will be reflected in the browser.
The elements are given the custom element tag, e.g. <testcomponent></testcomponent>. As shown in the following screenshot, when we inspect the same in the browser, we will not be able to see the custom tags in plain HTML.

var vm = new Vue({
   el: '#component_test',
   components:{
      'testcomponent': {
         template : '<div><h1>This is coming from component</h1></div>'
      }
   }
});
In this case, the components will be a part of only the vue instance created.We have seen the basic component with the basic options so far. In addition to data and methods, component also has data and methods just like a Vue instance.We will now extend the code, which we have already seen with data and methods.Example: <html> <head> <title>Instance</title> <script type = "text/javascript" src = "js/vue.js"></script> </head> <body> <div id = "component_test"> <testcomponent></testcomponent> </div> <div id = "component_test1"> <testcomponent></testcomponent> </div> <script type = "text/javascript" src = "js/vue_component.js"></script> </body> </html>vue_component.js
Vue.component('testcomponent',{
   template : '<div v-on:mouseover = "changename()" v-on:mouseout = "originalname();"><h1>Custom Component created by <span id = "name">{{name}}</span></h1></div>',
   data: function() {
      return {
         name : "Tom"
      }
   },
   methods:{
      changename : function() {
         this.name = "Ben";
      },
      originalname: function() {
         this.name = "Tom";
      }
   }
});

var vm = new Vue({
   el: '#component_test'
});

var vm1 = new Vue({
   el: '#component_test1'
});
In the .js file, we have added data that is a function that returns an object. The object has a name property that has the value ‘Tom’. The following template uses this value.
template : ‘<div v-on:mouseover = “changename()” v-on:mouseout = “originalname();”><h1>Custom Component created by <span id = “name”>{{name}}</span></h1></div>’,
In spite of having data as a function in components, we can use its properties the same way we use them with direct Vue instances. In addition, two new methods have been added, changename and originalname.In changename, we modify the name property, and in originalname, we restore it to its original value.
We have also added two events to the div, mouseover and mouseout. We will discuss the events in detail in the Events chapter. At the moment, mouseover calls changename method, and mouseout calls originalname method.
The following browser displays the same.
In the above browser, you can see it displays the name assigned in the data property, which is the same name.On the div, we have also assigned mouseover and mouseout events.See what happens when we mouseover and mouseout.
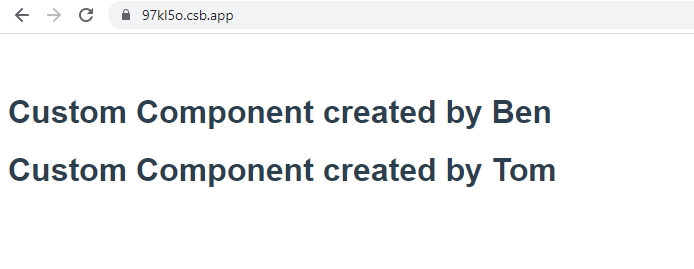
Mouseover reveals that the name of the first component is now Ben, while the name of the second remains unchanged. Due to the fact that the data component is a function, it returns an object. Therefore, changing it one place does not overwrite it elsewhere.
Dynamic Components
As shown in the following example, dynamic components are created using the keyword <component></component> and are bound with a property.
Example:

<html>
   <head>
      <title>Instance</title>
      <script type = "text/javascript" src = "js/vue.js"></script>
   </head>

   <body>
      <div id = "databinding">
         <component v-bind:is = "view"></component>
      </div>
      <script type = "text/javascript">
         var vm = new Vue({
            el: '#databinding',
            data: {
               view: 'component1'
            },

            components: {
               'component1': {
                  template: '<div><span style = "font-size:25;color:red;">Dynamic Component</span></div>'
               }
            }
         });
      </script>
   </body>
</html>
Output:
Dynamic components are created using the following syntax.
<component v-bind:is = “view”></component>
It has v-bind:is = “view”, and a value view is assigned to it. View is defined as follows in the Vue instance.
var vm = new Vue({
   el: '#databinding',
   data: {
      view: 'component1'
   },

   components: {
      'component1': {
         template: '<div><span style = "font-size:25;color:red;">Dynamic Component</span></div>'
      }
   }
});
In the browser, the template Dynamic Component is displayed.