We have already begun to learn VueJs. In the previous section we discuss some basic topics. Let’s move further in this section covers topics described below with full details and examples.
- Computed Properties
- Watch Property
- Binding
1. Computed Properties
We have already seen how to create a Vue instance and a component. Computed properties are like methods, but differ from methods in a few ways.
Let’s examine computed properties using an example.
Example:

<html>
   <head>
      <title>VueJs Instance</title>
      <script type = "text/javascript" src = "js/vue.js"></script>
   </head>

   <body>
      <div id = "computed_props">
         FirstName : <input type = "text" v-model = "firstname" /> <br/><br/>
         LastName : <input type = "text" v-model = "lastname"/> <br/><br/>
         <h1>My name is {{firstname}} {{lastname}}</h1>
         <h1>Using computed method : {{getfullname}}</h1>
      </div>
      <script type = "text/javascript" src = "js/vue_computedprops.js"></script>
   </body>
</html>
vue_computeprops.js
var vm = new Vue({
   el: '#computed_props',
   data: {
      firstname :"",
      lastname :"",
      birthyear : ""
   },
   computed :{
      getfullname : function(){
         return this.firstname +" "+ this.lastname;
      }
   }
})
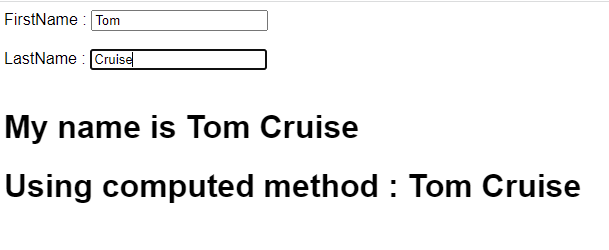
Here we are creating a .html file with firstname and lastname. The firstname and lastname textboxes are bound by the properties firstname and lastname.
We are calling the computed method getfullname, which returns the first and last names entered.
computed :{
   getfullname : function(){
      return this.firstname +" "+ this.lastname;
   }
}
Whenever we change the properties firstname or lastname, the function returns the same value, as we type in the textbox. By using computed, we don’t have to do anything specific, like remembering to call a function. With computed, it gets called by itself since the properties used inside change, such as firstname and lastname.
The following browser displays the same. With the computed function, inserting text into the textbox will update the same.
Output:
Let’s examine the difference between a method and a computed property. Both are objects. There are functions inside that return a value.
In the case of a method, we refer to it as a function, and for computed, we refer to it as a property.Let’s examine the difference between a method and a computed property by using the following example.
<html>
   <head>
      <title>VueJs Instance</title>
      <script type = "text/javascript" src = "js/vue.js"></script>
   </head>

   <body>
      <div id = "computed_props">
         <h1 style = "background-color:gray;">Random Numder from computed property: {{getrandomno}}</h1>
         <h1>Random Number from method: {{getrandomno1()}}</h1>
         <h1>Random Number from method : {{getrandomno1()}}</h1>
         <h1  style = "background-color:gray;">Random Number from computed property: {{getrandomno}}</h1>
         <h1  style = "background-color:gray;">Random Number from computed property: {{getrandomno}}</h1>
         <h1  style = "background-color:gray;">Random Number from computed
            property: {{getrandomno}}</h1>
         <h1>Random No from method: {{getrandomno1()}}</h1>
         <h1>Random No from method: {{getrandomno1()}}</h1>
      </div>
      <script type = "text/javascript">
         var vm = new Vue({
            el: '#computed_props',
            data: {
               name : "helloworld"
            },
            methods: {
               getrandomno1 : function() {
                  return Math.random();
               }
            },
            computed :{
               getrandomno : function(){
                  return Math.random();
               }
            }
         });
      </script>
   </body>
</html>
Our above code creates a method called getrandomno1 and a computed property called getrandomno. Both methods return random numbers using Math.random().
Below is an example of how it appears in the browser. The method and computed property are called repeatedly to illustrate the difference.
Output:

We see from the values above that the random numbers returned from the computed property remain the same regardless of how many times it is called. A method is a function, so every time it is called, it returns a new value, while a method is a function, hence, every time it is called it returns the same value.
Get/Set in Computed Properties
With the help of an example, we will learn about get/set functions in computed properties.
Example:

<html>
   <head>
      <title>VueJs Instance</title>
      <script type = "text/javascript" src = "js/vue.js"></script>
   </head>

   <body>
      <div id = "computed_props">
         <input type = "text" v-model = "fullname" />
         <h1>{{firstName}}</h1>
         <h1>{{lastName}}</h1>
      </div>

      <script type = "text/javascript">
         var vm = new Vue({
            el: '#computed_props',
            data: {
               firstName : "Tom",
               lastName : "Cruise"
            },

            methods: {
            },

            computed :{
               fullname : {
                  get : function() {
                     return this.firstName+" "+this.lastName;
                  }
               }
            }
         });
      </script>
   </body>
</html>
We have defined an input box that is bound to the fullname property.The function get returns the fullname of the object, This is the first name and last name. We have also displayed the firstname and lastname as –
<h1>{{firstName}}</h1>
<h1>{{lastName}}</h1>
Let’s check the same in the browser.
Output:
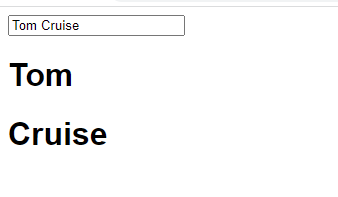
If we change the name in the textbox, this will not reflect in the name displayed in the following screenshot.
<html>
   <head>
      <title>VueJs Instance</title>
      <script type = "text/javascript" src = "js/vue.js"></script>
   </head>

   <body>
      <div id = "computed_props">
         <input type = "text" v-model = "fullname" />
         <h1>{{firstName}}</h1>
         <h1>{{lastName}}</h1>
      </div>

      <script type = "text/javascript">
         var vm = new Vue({
            el: '#computed_props',
            data: {
               firstName : "Tom",
               lastName : "Cruise"
            },

            methods: {
            },

            computed :{
               fullname : {
                  get : function() {
                     return this.firstName+" "+this.lastName;
                  },

                  set : function(name) {
                     var fname = name.split(" ");
                     this.firstName = fname[0];
                     this.lastName = fname[1]
                  }
               }
            }
         });

      </script>
   </body>
</html>
We have added the set function in the fullname computed property.
computed :{
   fullname : {
      get : function() {
         return this.firstName+" "+this.lastName;
      },

      set : function(name) {
         var fname = name.split(" ");
         this.firstName = fname[0];
         this.lastName = fname[1]
      }
   }
}
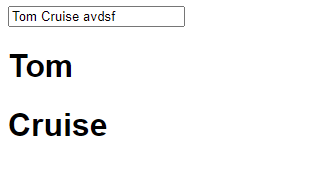
The parameter is the name, which is merely the fullname in the textbox.Afterward, it is split on space and the firstname and lastname are updated. Now, if we edit the textbox in the browser and run the code, the same result will be displayed.Because of the set function, the firstname and lastname will be updated.Get returns the firstname and lastname, while set updates them if anything is modified.
Output:

According to the screenshot above, whatever is typed in the textbox matches what is displayed.
2. Watch Property
With an example, we will demonstrate how to use VueJS’ Watch property.
Example:

<html>
   <head>
      <title>VueJs Instance</title>
      <script type = "text/javascript" src = "js/vue.js"></script>
   </head>

   <body>
      <div id = "computed_props">
         Kilometers : <input type = "text" v-model = "kilometers">
         Meters : <input type = "text" v-model = "meters">
      </div>

      <script type = "text/javascript">
         var vm = new Vue({
            el: '#computed_props',
            data: {
               kilometers : 0,
               meters:0
            },

            methods: {
            },

            computed :{
            },

            watch : {
               kilometers:function(val) {
                  this.kilometers = val;
                  this.meters = val * 1000;
               },

               meters : function (val) {
                  this.kilometers = val/ 1000;
                  this.meters = val;
               }
            }
         });
      </script>
   </body>
</html>
Using the above code, we have created two textboxes, one with kilometers and the other with meters.Data property initializes kilometers and meters to zero.
The watch object has two functions: kilometers and meters.In both the functions, the conversion from kilometers to meters and from meters to kilometers is done.
As we enter values inside any of the texboxes, whichever is changed, Watch takes care of updating both the textboxes. There is no need to add any events, wait for them to change, and do the extra work of validating. Watch updates the textboxes with the calculation done in the respective functions.
Let’s take a look at the output in the browser.
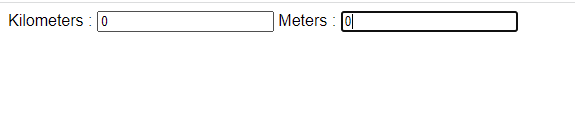
Enter some values in the kilometers textbox and see how they change in the meters textbox, and vice versa.

Now let’s enter in the meters textbox and see how the kilometers textbox changes. Here is how it looks in the browser.

3. Binding
You will learn how to manipulate or assign values to HTML attributes, change the style, and assign classes using a binding directive called v-bind available in VueJS.
In order to understand why we need and when to use the v-bind directive for data binding, let’s look at an example.
Example:

<html>
   <head>
      <title>VueJs Instance</title>
      <script type = "text/javascript" src = "js/vue.js"></script>
   </head>

   <body>
      <div id = "databinding">
         {{title}}<br/>
         <a href = "hreflink" target = "_blank"> Click Me </a> <br/>
         <a href = "{hreflink}" target = "_blank">Click Me </a>  <br/>
         <a v-bind:href = "hreflink" target = "_blank">Click Me </a>   <br/>
      </div>

      <script type = "text/javascript">
         var vm = new Vue({
            el: '#databinding',
            data: {
               title : "DATA BINDING",
               hreflink : "http://www.google.com"
            }
         });
      </script>
   </body>
</html>
The example above displays a title variable and three anchor links. We have also assigned a value to the href from the data object.
The first two anchor links do not have the href correctly as shown in the following screenshot, if we check the output in the browser.
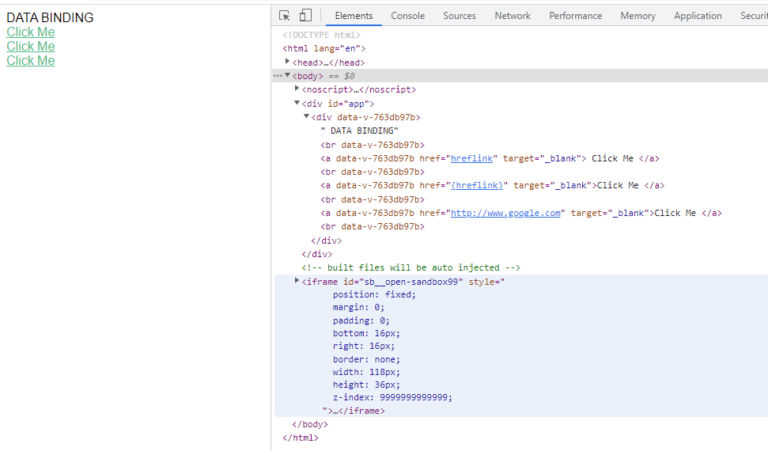
In the first clickme, the href link is shown as {hreflink}, in the second it is displayed as
{{hreflink}}, and in the last it is displayed as the correct url that we require.
For this reason, we need to bind HTML attributes with the directive v-bind as follows.
<a v-bind:href = "hreflink" target = "_blank">Click Me
VueJS also provides a shorthand for v-bind as follows.
<a :href = "hreflink" target = "_blank">Click Me
If we see the inspect element in the browser, the anchor tag does not show the v-bind attribute, however, it displays the plain HTML. None of the VueJS properties are seen when we inpsect the DOM.
Binding HTML Classes
We need to use v-bind: class to bind HTML classes. Let’s take a look at an example.
Example:

<html>
   <head>
      <title>VueJs Instance</title>
      <script type = "text/javascript" src = "js/vue.js"></script>
   </head>

   <body>
      <style>
         .active {
            background: red;
         }

      </style>
      <div id = "classbinding">
         <div v-bind:class = "{active:isactive}"><b>{{title}}</b></div>
      </div>

      <script type = "text/javascript">
         var vm = new Vue({
            el: '#classbinding',
            data: {
               title : "CLASS BINDING EXAMPLE",
               isactive : true
            }
         });
      </script>
   </body>
</html>
Within this div is a div using the v-bind class “{active: isactive}.”
Basically, isactive is a variable which depends on whether true or false. In the latter case, it will apply the class active to the div. In the data object, we have set the isactive variable to true. There is a class defined in the style .active with the background color as red.
Following will be the output of the browser if the variable isactive is true. If it is not, then the color won’t be applied.
Output:

The variable isactive is changed to false in the following code to show the result.
<html>
   <head>
      <title>VueJs Instance</title>
      <script type = "text/javascript" src = "js/vue.js"></script>
   </head>

   <body>
      <style>
         .active {
            background: red;
         }
      </style>

      <div id = "classbinding">
         <div v-bind:class = "{active:isactive}"><b>{{title}}</b></div>
      </div>

      <script type = "text/javascript">
         var vm = new Vue({
            el: '#classbinding',
            data: {
               title : "CLASS BINDING EXAMPLE",
               isactive : false
            }
         });
      </script>
   </body>
</html>
Output:
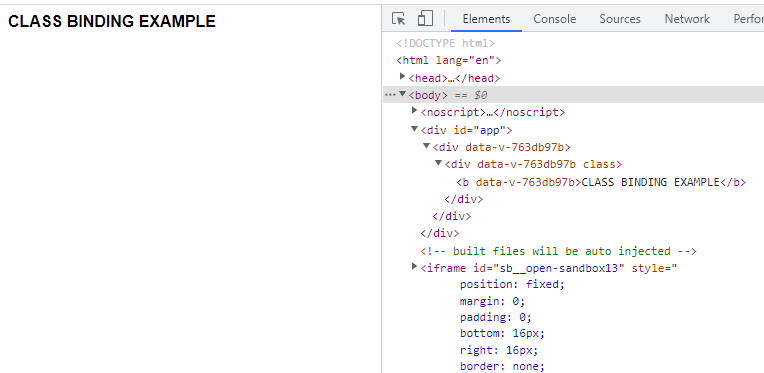
Here, we see that the active class is not applied to the div.
V-bind attributes let us assign multiple classes to HTML tags.
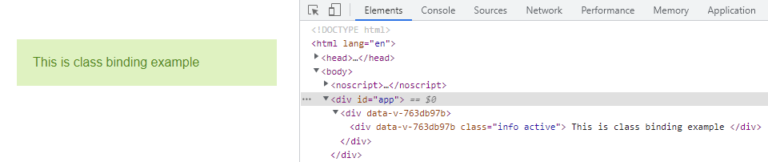
Example:

<html>
   <head>
      <title>VueJs Instance</title>
      <script type = "text/javascript" src = "js/vue.js"></script>
   </head>

   <body>
      <style>
         .info {
            color: #7a496c;
            background-color: #f0c5e3;
         }
         div {
            margin: 15px 0;
            padding: 20px;
         }
         .active {
            color: #4F8A10;
            background-color: #DFF2BF;
         }
         .displayError{
            color: #D8000C;
            background-color: #FFBABA;
         }
      </style>
      <div id = "classbinding">
         <div class = "info"  v-bind:class = "{ active: isActive, 'displayError': hasError }">
            {{title}}
         </div>
      </div>
      <script type = "text/javascript">
         var vm = new Vue({
            el: '#classbinding',
            data: {
               title : "This is class binding example",
               isActive : false,
               hasError : false
            }
         });
      </script>
   </body>
</html>
This code applies a normal class to the div, for example class = “info”. Based on the isActive and hasError variables, the other classes will be applied.
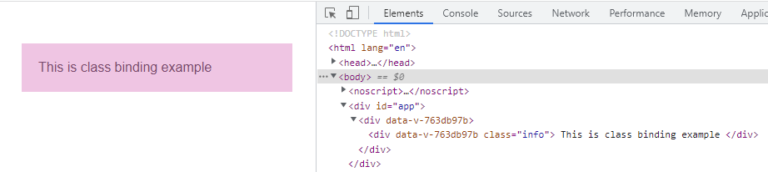
Output:
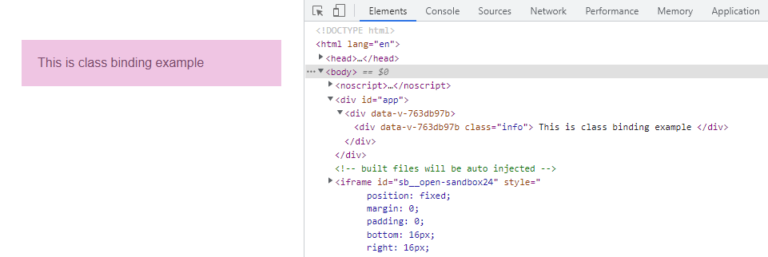
Here is a normal class with two variables set to false. Let’s set the isActive variable to true and see what happens.
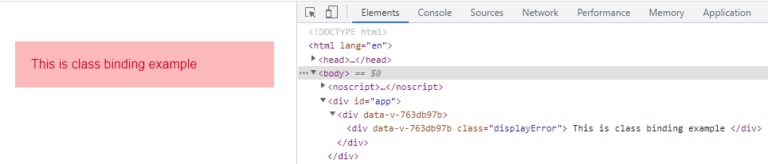
In the above display, in the DOM, there are two classes assigned to the div, info and active. Let’s set the hasError variable to true, and the isActive variable to false.

In the above display, we see the info and displayError classes applied to the div. This is how we can apply multiple classes based on conditions.
You can also pass a class as an array. Here’s an example.
Example:

<html>
   <head>
      <title>VueJs Instance</title>
      <script type = "text/javascript" src = "js/vue.js"></script>
   </head>

   <body>
      <style>
         .info {
            color: #7a496c;
            background-color: #f0c5e3;
         }
         div {
            margin: 15px 0;
            padding: 20px;
         }
         .active {
            color: #4F8A10;
            background-color: #DFF2BF;
         }
         .displayError{
            color: #D8000C;
            background-color: #FFBABA;
         }
      </style>
      <div id = "classbinding">
         <div v-bind:class = "[infoclass, errorclass]">{{title}}</div>
      </div>
      <script type = "text/javascript">
         var vm = new Vue({
            el: '#classbinding',
            data: {
               title : "This is class binding example",
               infoclass : 'info',
               errorclass : 'displayError'
            }
         });
      </script>
   </body>
</html>
Output:

<html>
   <head>
      <title>VueJs Instance</title>
      <script type = "text/javascript" src = "js/vue.js"></script>
   </head>
   <body>
      <style>
         .info {
            color: #7a496c;
            background-color: #f0c5e3;
         }
         div {
            margin: 15px 0;
            padding: 20px;
         }
         .active {
            color: #4F8A10;
            background-color: #DFF2BF;
         }
         .displayError{
            color: #D8000C;
            background-color: #FFBABA;
         }
      </style>
      <div id = "classbinding">
         <div v-bind:class = "[isActive ? infoclass : '', haserror ? errorclass : '']">{{title}}</div>
      </div>
      <script type = "text/javascript">
         var vm = new Vue({
            el: '#classbinding',
            data: {
               title : "This is class binding example",
               infoclass : 'info',
               errorclass : 'displayError',
               isActive : true,
               haserror : false
            }
         });
      </script>
   </body>
</html>
While class binding, we use two variables isActive and haserror, as shown in the following div tag.
<div v-bind:class = "[isActive ? infoclass : '', haserror ? errorclass : '']">{{title}}</div>It will be assigned an infoclass if isActive is true.Similarly, if haserror is true, only errorClass will be applied.
Let us now set haserror to true and isActive to false.
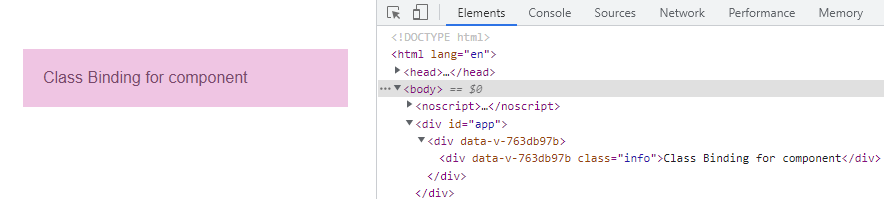
Example:

<html>
   <head>
      <title>VueJs Instance</title>
      <script type = "text/javascript" src = "js/vue.js"></script>
   </head>

   <body>
      <style>
         .info {
            color: #7a496c;
            background-color: #f0c5e3;
         }
         div {
            margin: 15px 0;
            padding: 20px;
         }
         .active {
            color: #4F8A10;
            background-color: #DFF2BF;
         }
         .displayError{
            color: #D8000C;
            background-color: #FFBABA;
         }
      </style>
      <div id = "classbinding">
         <new_component class = "active"></new_component>
      </div>
      <script type = "text/javascript">
         var vm = new Vue({
            el: '#classbinding',
            data: {
               title : "This is class binding example",
               infoclass : 'info',
               errorclass : 'displayError',
               isActive : false,
               haserror : true
            },
            components:{
               'new_component' : {
                  template : '<div class = "info">Class Binding for component</div>'
               }
            }
         });
      </script>
   </body>
</html>
Following is the output in the browser. It applies both the classes to final div.
<div class = ”info active”></div>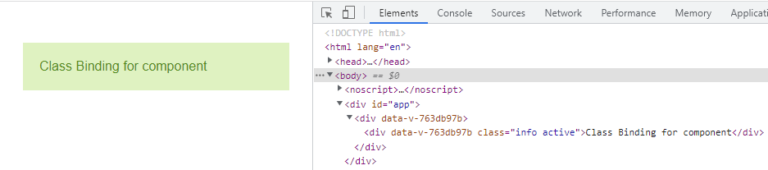
<html>
   <head>
      <title>VueJs Instance</title>
      <script type = "text/javascript" src = "js/vue.js"></script>
   </head>
   <body>
      <style>
         .info {
            color: #7a496c;
            background-color: #f0c5e3;
         }
         div {
            margin: 15px 0;
            padding: 20px;
         }
         .active {
            color: #4F8A10;
            background-color: #DFF2BF;
         }
         .displayError{
            color: #D8000C;
            background-color: #FFBABA;
         }
      </style>
      <div id = "classbinding">
         <new_component v-bind:class = "{active:isActive}"></new_component>
      </div>
      <script type = "text/javascript">
         var vm = new Vue({
            el: '#classbinding',
            data: {
               title : "This is class binding example",
               infoclass : 'info',
               errorclass : 'displayError',
               isActive : false,
               haserror : true
            },
            components:{
               'new_component' : {
                  template : '<div class = "info">Class Binding for component</div>'
               }
            }
         });
      </script>
   </body>
</html>
As shown in the following screenshot, the active class is not applied because the variable is false.
Binding Inline Styles
Object Syntax
Example:

<html>
   <head>
      <title>VueJs Instance</title>
      <script type = "text/javascript" src = "js/vue.js"></script>
   </head>
   <body>
      <div id = "databinding">
         <div v-bind:style = "{ color: activeColor, fontSize: fontSize + 'px' }">{{title}}</div>
     </div>
     <script type = "text/javascript">
         var vm = new Vue({
            el: '#databinding',
            data: {
               title : "Inline style Binding",
               activeColor: 'red',
               fontSize :'30'
            }
         });
      </script>
   </body>
</html>
Output:
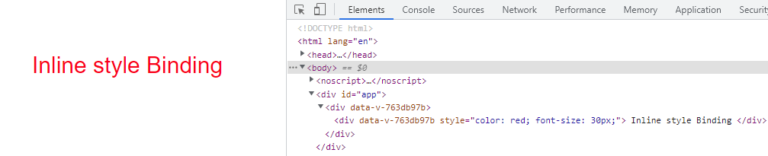
<div v-bind:style = "{ color: activeColor, fontSize: fontSize + 'px' }">{{title}}</div>
data: {
   title : "Inline style Binding",
   activeColor: 'red',
   fontSize :'30'
}
Alternatively, we can assign all the values to a variable and then assign the variable to the div.
Example:

<html>
   <head>
      <title>VueJs Instance</title>
      <script type = "text/javascript" src = "js/vue.js"></script>
   </head>
   <body>
      <div id = "databinding">
         <div v-bind:style = "styleobj">{{title}}</div>
      </div>
      <script type = "text/javascript">
         var vm = new Vue({
            el: '#databinding',
            data: {
               title : "Inline style Binding",
               styleobj : {
                  color: 'red',
                  fontSize :'40px'
               }
            }
         });
      </script>
   </body>
</html>
The color and the fontSize are assigned to an object called styleobj, and the same is assigned to the div.
<div v-bind:style = "styleobj">{{title}}</div>Output:
Form Input Bindings
So far, we have seen that v-model bound the input text element to a variable and assigned the value to that variable. Here’s more on the topic.
Example:

<html>
   <head>
      <title>VueJs Instance</title>
      <script type = "text/javascript" src = "js/vue.js"></script>
   </head>
   <body>
      <div id = "databinding">
         <h3>TEXTBOX</h3>
         <input  v-model = "name" placeholder = "Name" />
         <h3>Name entered is : {{name}}</h3>
         <hr/>
         <h3>Textarea</h3>
         <textarea v-model = "textmessage" placeholder = "Details"></textarea>
         <h1><p>{{textmessage}}</p></h1>
         <hr/>
         <h3>Checkbox</h3>
         <input type = "checkbox" id = "checkbox" v-model = "checked"> {{checked}}
      </div>
      <script type = "text/javascript">
         var vm = new Vue({
            el: '#databinding',
            data: {
               name:'',
               textmessage:'',
               checked : false
            }
         });
      </script>
   </body>
</html>
The texbox displays whatever we type. The v-model is assigned the value name and is displayed in {{name}}, which displays whatever is entered in the textbox.
Output:

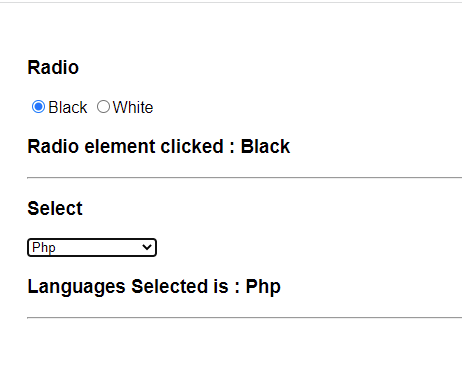
Radio and Select
Example:

<html>
   <head>
      <title>VueJs Instance</title>
      <script type = "text/javascript" src = "js/vue.js"></script>
   </head>
   <body>
      <div id = "databinding">
         <h3>Radio</h3>
         <input type = "radio" id = "black" value = "Black" v-model = "picked">Black
         <input type = "radio" id = "white" value = "White" v-model = "picked">White
         <h3>Radio element clicked : {{picked}} </h3>
         <hr/>
         <h3>Select</h3>
         <select v-model = "languages">
            <option disabled value = "">Please select one</option>
            <option>Java</option>
            <option>Javascript</option>
            <option>Php</option>
            <option>C</option>
            <option>C++</option>
         </select>
         <h3>Languages Selected is : {{ languages }}</h3>
         <hr/>
      </div>
      <script type = "text/javascript">
         var vm = new Vue({
            el: '#databinding',
            data: {
               picked : 'White',
               languages : "Java"
            }
         });
      </script>
   </body>
</html>
Output:
Modifiers
In the example, we used three modifiers – trim, number, and lazy.Example: <html> <head> <title>VueJs Instance</title> <script type = "text/javascript" src = "js/vue.js"></script> </head> <body> <div id = "databinding"> <span style = "font-size:25px;">Enter Age:</span> <input v-model.number = "age" type = "number"> <br/> <span style = "font-size:25px;">Enter Message:</span> <input v-model.lazy = "msg"> <h3>Display Message : {{msg}}</h3> <br/> <span style = "font-size:25px;">Enter Message : </span><input v-model.trim = "message"> <h3>Display Message : {{message}}</h3> </div> <script type = "text/javascript"> var vm = new Vue({ el: '#databinding', data: { age : 0, msg: '', message : '' } }); </script> </body> </html>Output:

The number modifier allows you to only enter numbers. You cannot enter anything else besides numbers.
<span style = "font-size:25px;">Enter Age:</span> <input v-model.number = "age" type = "number">
As soon as the user exits the textbox, the lazy modifier will display the content in the textbox.
<span style = "font-size:25px;">Enter Message:</span> <input v-model.lazy = "msg">
The Trim modifier will remove spaces at the start and at the end.
<span style = "font-size:25px;">Enter Message : </span><input v-model.trim = "message">
In the next section, you will learn about Vuejs events like clicks, custom clicks, and different types of rendering with full details and examples.