In the previous section of VueJs, we discussed property-related topics. In this section, we learn about events like clicks, custom clicks, and different types of rendering with full details and examples.
- Events
- Rendering
1. VueJS Events:
VueJS uses the v-on attribute to listen to events on DOM elements.
Click Event
Example:

<html>
   <head>
      <title>VueJs Instance</title>
      <script type = "text/javascript" src = "js/vue.js"></script>
   </head>
   <body>
      <div id = "databinding">
         <button v-on:click = "displaynumbers">Click Here</button>
         <h2> Add Number 10 + 20 = {{total}}</h2>
      </div>
      <script type = "text/javascript">
         var vm = new Vue({
            el: '#databinding',
            data: {
               num1: 10,
               num2 : 20,
               total : ''
            },
            methods : {
               displaynumbers : function(event) {
                  console.log(event);
                  return this.total =  this.num1+ this.num2;
               }
            },
         });
      </script>
   </body>
</html>
Output: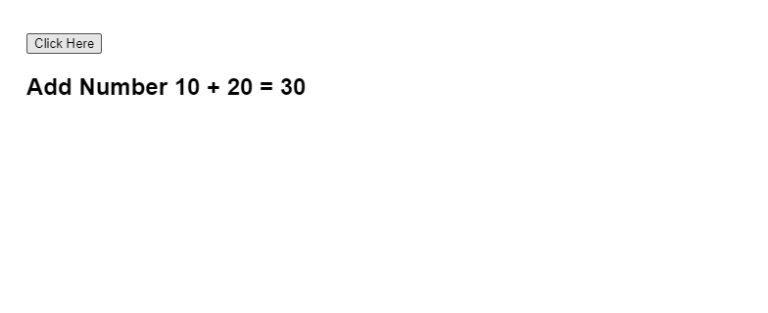
A click event is assigned to the DOM element using the following code.
<button v-on:click = "displaynumbers">Click Here</button>
As v-on has a shorthand, we can also refer to it as −
<button @click = "displaynumbers">Click Here</button>
It will call the method ‘displaynumbers’ on clicking the button, which takes in the event and consoles it in the browser as shown in the example above.
Let’s check one more event mouseover mouseout.
Example:

<html>
   <head>
      <title>VueJs Instance</title>
      <script type = "text/javascript" src = "js/vue.js"></script>
   </head>
   <body>
      <div id = "databinding">
         <div v-bind:style = "styleobj" v-on:mouseover = "changebgcolor" v-on:mouseout = "originalcolor"></div>
      </div>
      <script type = "text/javascript">
         var vm = new Vue({
            el: '#databinding',
            data: {
               num1: 10,
               num2 : 20,
               total : '',
               styleobj : {
                  width:"100px",
                  height:"100px",
                  backgroundColor:"red"
               }
            },
            methods : {
               changebgcolor : function() {
                  this.styleobj.backgroundColor = "green";
               },
               originalcolor : function() {
                  this.styleobj.backgroundColor = "red";
               }
            },
         });
      </script>
   </body>
</html>
As you can see from the example above, we have created a div with width and height of 100px. We have given it a red background. Mouseover changes the color to green, and mouseout returns the color to red.
Hence, during mouseover, a method is called changebgcolor, and once the mouse exits the div, a method is called originalcolor.
This is done as follows −
<div v-bind:style = "styleobj" v-on:mouseover = "changebgcolor" v-on:mouseout = "originalcolor"></div>
In the example above, the div is assigned two mouseover events and one mouseout event. We have created a styleobj variable and assigned the required style to the div. The same variable is bound to the div using v-bind:style = “styleobj”
In changebgcolor, we change the color to green.
changebgcolor : function() {
   this.styleobj.backgroundColor = "green";
}
With the stylobj variable, we are changing the color to green.
For the color to return to its original state, we use the following code.
originalcolor : function() {
   this.styleobj.backgroundColor = "red";
}
This is what we see in the browser.

Upon mouseover, the color will change to green, as shown in the following screenshot.

Event Modifiers
V-on attribute has event modifiers available. Here are the available modifiers.
.once
Allows the event to execute only once.
Syntax:
<button v-on:click.once = "buttonclicked">Click Once</button>
In the syntax above, we need to add a dot operator when calling the modifiers. Let us use it in an example and understand the working of the once modifier.
Example:

<html>
   <head>
      <title>VueJs Instance</title>
      <script type = "text/javascript" src = "js/vue.js"></script>
   </head>
   <body>
     <div id = "databinding">
         <button v-on:click.once = "buttonclickedonce" v-bind:style = "styleobj">Click Once</button>
         Output:{{clicknum}}
         <br/><br/>
         <button v-on:click = "buttonclicked"  v-bind:style = "styleobj">Click Here</button>
         Output:{{clicknum1}}
      </div>
      <script type = "text/javascript">
         var vm = new Vue({
            el: '#databinding',
            data: {
               clicknum : 0,
               clicknum1 :0,
               styleobj: {
                  backgroundColor: '#2196F3',
                  cursor: 'pointer',
                  padding: '8px 16px',
                  verticalAlign: 'middle',
               }
            },
            methods : {
               buttonclickedonce : function() {
                  this.clicknum++;
               },
               buttonclicked : function() {
                  this.clicknum1++;
               }
            }
         });
      </script>
   </body>
</html>
Output: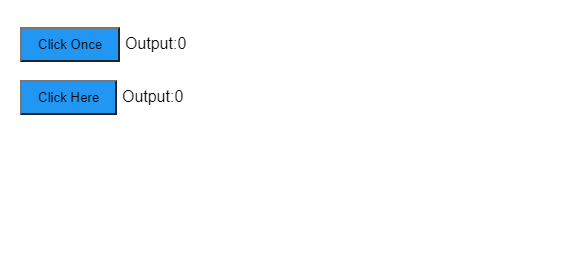
Using the above example, we have created two buttons. The button with the Click Once label has the once modifier, while the other button does not have any modifier. This is how the buttons are defined.
<button v-on:click.once = "buttonclickedonce" v-bind:style = "styleobj">Click Once</button>
<button v-on:click = "buttonclicked" v-bind:style = "styleobj">Click Here</button>
It calls the method “buttonclickedonce”, while the second button calls “buttonclicked”.
buttonclickedonce : function() {
   this.clicknum++;
},
buttonclicked : function() {
this.clicknum1++;
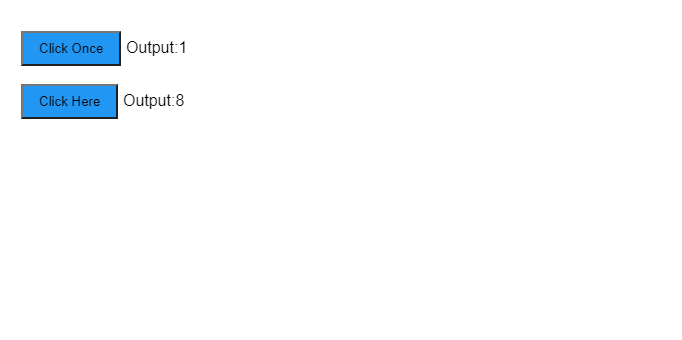
}Clicknum1 and clicknum2 are both variables that are incremented when the button is clicked. Both of the variables are initially set to 0, as shown in the output.
Upon clicking the first button, clicknum increments by 1. Upon clicking the second button, however, clicknum doesn’t increment since the modifier prevents it from executing or performing any action item assigned on the click of the button.
On clicking the second button, the same action is carried out, i.e. the variable is incremented. On every click, the value is incremented and displayed.
Following is the output we get in the browser.
.prevent
Syntax:

<a href = "http://www.google.com" v-on:click.prevent = "clickme">Click Here</a>
Example:

<html>
   <head>
      <title>VueJs Instance</title>
      <script type = "text/javascript" src = "js/vue.js"></script>
   </head>
   <body>
      <div id = "databinding">
         <a href = "http://www.google.com" v-on:click = "clickme" target = "_blank" v-bind:style = "styleobj">Click Here</a>
      </div>
      <script type = "text/javascript">
         var vm = new Vue({
            el: '#databinding',
            data: {
               clicknum : 0,
               clicknum1 :0,
               styleobj: {
                  color: '#4CAF50',
                  marginLeft: '20px',
                  fontSize: '30px'
               }
            },
            methods : {
               clickme : function() {
                  alert("Anchor tag is clicked");
               }
            }
         });
      </script>
   </body>
</html>
Output:
In the screenshots below, if we click the clickme link, it will send a message that says “Anchor tag is clicked” and open the https://www.google.com link.
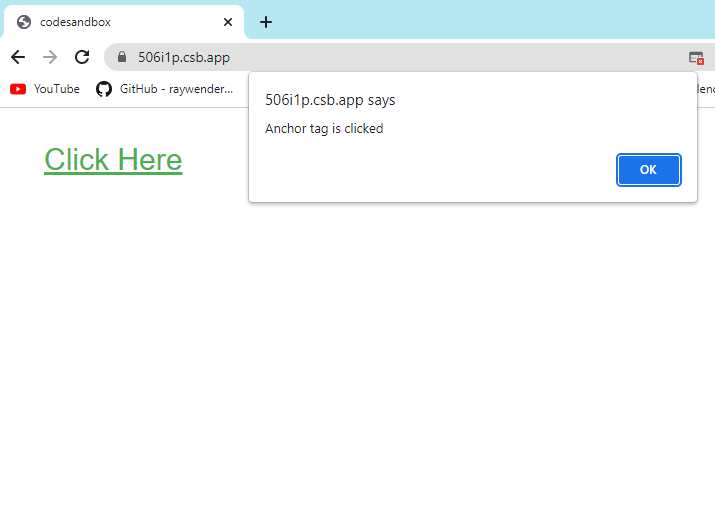
This works as normal, i.e. the link opens up as we want, but if we don’t want it to open up, we need to add a prevent modifier to the event like this.
<a href = "http://www.google.com" v-on:click.prevent = "clickme" target = "_blank" v-bind:style = "styleobj">Click Here</a>
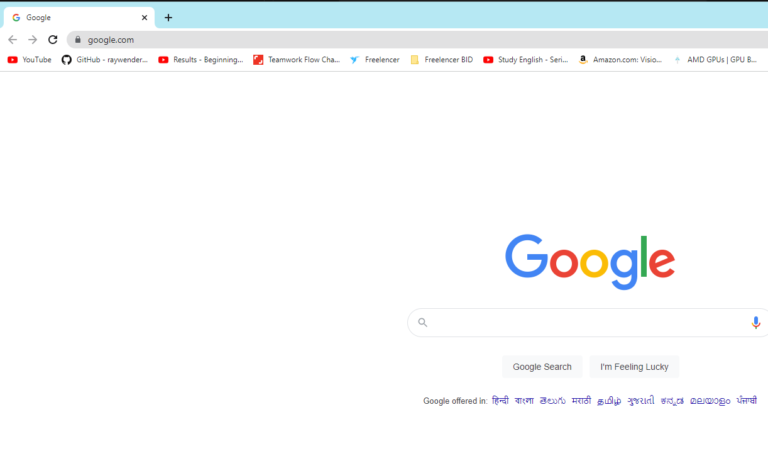
If we click on the button, we will receive an alert, but it will not open the link. The prevent modifier prevents the link from opening and only executes the method associated with the tag.
Example:

<html>
   <head>
      <title>VueJs Instance</title>
      <script type = "text/javascript" src = "js/vue.js"></script>
   </head>
   <body>
      <div id = "databinding">
         <a href = "http://www.google.com" v-on:click.prevent = "clickme" target = "_blank" v-bind:style = "styleobj">Click Here</a>
      </div>
      <script type = "text/javascript">
         var vm = new Vue({
            el: '#databinding',
            data: {
               clicknum : 0,
               clicknum1 :0,
               styleobj: {
                  color: '#4CAF50',
                  marginLeft: '20px',
                  fontSize: '30px'
               }
            },
            methods : {
               clickme : function() {
                  alert("Anchor tag is clicked");
               }
            }
         });
      </script>
   </body>
</html>
Output:
When you click the link, it displays an alert message instead of opening the URL.
Event – Key Modifiers
As a result of the key modifiers built into the events in VueJS, we can control the handling of events more precisely. For example, if we had a textbox, we could add a key modifier that makes the event only fire when the user presses Enter.
Syntax:
<input type = "text"  v-on:keyup.enter = "showinputvalue"/>
The key that we want to apply to our event is V-on.eventname.keyname (as shown above)
There are multiple keynames we can use. For example, V-on.keyup.ctrl.enter
Example:
<html>
<head>
<title>VueJs Instance</title>
<script type = "text/javascript" src = "js/vue.js"></script>
</head>
<body>
<div id = "databinding">
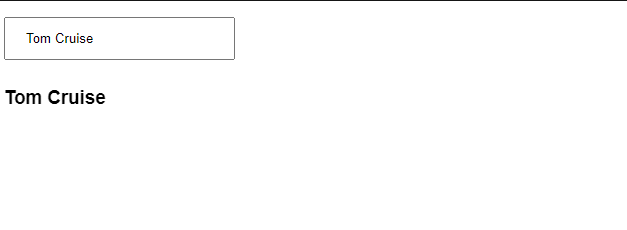
<input type = "text" v-on:keyup.enter = "showinputvalue" v-bind:style = "styleobj" placeholder = "Enter your name"/>
<h3> {{name}}</h3>
</div>
<script type = "text/javascript">
var vm = new Vue({
el: '#databinding',
data: {
name:'',
styleobj: {
width: "30%",
padding: "12px 20px",
margin: "8px 0",
boxSizing: "border-box"
}
},
methods : {
showinputvalue : function(event) {
this.name=event.target.value;
}
}
});
</script>
</body>
</html>Output:
Once we press Enter in the textbox, the text will be displayed.
Custom Events
We can pass data between a parent and a child component via the prop attribute, but we need to notify the parent when there is a change in the child component. For this, we can use custom events.
Parent components can listen to child component events using the v-on attribute.
Lorem ipsum dolor sit amet, consectetur adipiscing elit. Ut elit tellus, luctus nec ullamcorper mattis, pulvinar dapibus leo.
Example:
<html>
<head>
<title>VueJs Instance</title>
<script type = "text/javascript" src = "js/vue.js"></script>
</head>
<body>
<div id = "databinding">
<div id = "counter-event-example">
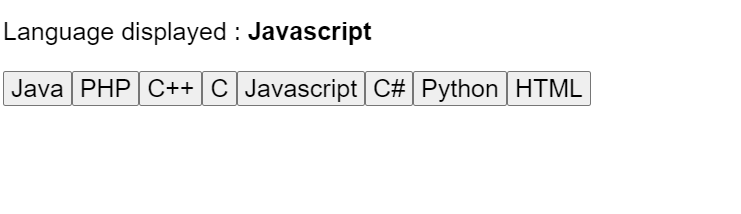
<p style = "font-size:25px;">Language displayed : <b>{{ languageclicked }}</b></p>
<button-counter
v-for = "(item, index) in languages"
v-bind:item = "item"
v-bind:index = "index"
v-on:showlanguage = "languagedisp"></button-counter>
</div>
</div>
<script type = "text/javascript">
Vue.component('button-counter', {
template: '<button v-on:click = "displayLanguage(item)"><span style = "font-size:25px;">{{ item }}</span></button>',
data: function () {
return {
counter: 0
}
},
props:['item'],
methods: {
displayLanguage: function (lng) {
console.log(lng);
this.$emit('showlanguage', lng);
}
},
});
var vm = new Vue({
el: '#databinding',
data: {
languageclicked: "",
languages : ["Java", "PHP", "C++", "C", "Javascript", "C#", "Python", "HTML"]
},
methods: {
languagedisp: function (a) {
this.languageclicked = a;
}
}
})
</script>
</body>
</html>Output: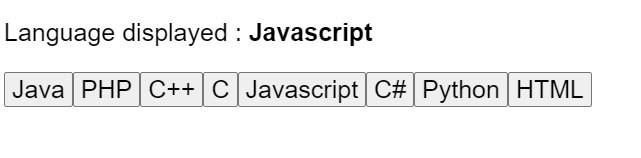
<button-counter
   v-for = "(item, index) in languages"
   v-bind:item = "item"
   v-bind:index = "index"
   v-on:showlanguage = "languagedisp">
</button-counter>
The v-for attribute loops through the languages array. The array contains a list of languages. This information needs to be sent to the child component. An item and an index contain the array values.
v-bind:item = "item"
v-bind:index = "index"
To In order to refer to the values of the array, we must bind it to a variable first, and the variable is referred to using the props property.
Vue.component('button-counter', {
   template: '<button v-on:click = "displayLanguage(item)"><span style = "font-size:25px;">{{ item }}</span></button>',
   data: function () {
      return {
         counter: 0
      }
   },
   props:['item'],
   methods: {
      displayLanguage: function (lng) {
         console.log(lng);
         this.$emit('showlanguage', lng);
      }
   },
});
The props property contains the item as an array. You can also refer to the index as -.props:[‘item’, ‘index’]There is also an event added to the component as follows −
<button-counter
   v-for = "(item, index) in languages"
   v-bind:item = "item"
   v-bind:index = "index"
   v-on:showlanguage = "languagedisp">
</button-counter>
The showlanguage event calls a method called languagedisp in the Vue instance called languagedisp.In the component, the template is defined as follows −
template: '<button v-on:click = "displayLanguage(item)"><span style = "font-size:25px;">{{ item }}</span></button>',There is a button. When you click the button, it will link to all the languages in the array. There is a click-on method named displayLanguage and the button-clicked item is passed as a param to the method. As a result, the component needs to send the clicked element to the parent component for display, which is done as follows –Vue.component('button-counter', {
template: '<button v-on:click = "displayLanguage(item)"><span style = "font-size:25px;">{{ item }}</span></button>',
data: function () {
return {
counter: 0
}
},
props:['item'],
methods: {
displayLanguage: function (lng) {
console.log(lng);
this.$emit('showlanguage', lng);
}
},
});The method displayLanguage calls this.$emit(‘showlanguage’, lng);
To call the parent component method, use $emit. In the component with v-on, showlanguage is the event name.
<button-counter
   v-for = "(item, index) in languages"
   v-bind:item = "item"
   v-bind:index = "index"
   v-on:showlanguage = "languagedisp">
</button-counter>
We Passing back a parameter to the parent Vue instance, i.e. the name of the language clicked, this method is defined as follows.
var vm = new Vue({
   el: '#databinding',
   data: {
      languageclicked: "",
      languages : ["Java", "PHP", "C++", "C", "Javascript", "C#", "Python", "HTML"]
   },
   methods: {
      languagedisp: function (a) {
         this.languageclicked = a;
      }
   }
})
Vue instance methods call languagedisp from emit, which then triggers showlanguage. It assigns the language clicked value to the variable languageclicked, which is then displayed in the browser as shown in the following screenshot.
<p style = "font-size:25px;">Language displayed : <b>{{ languageclicked }}</b></p>Following is the output we get in the browser.
2. VueJS Rendering
VueJS have two different types of rendering. conditional rendering and list rendering. We will discuss how to use if, if-else, if-else-if, show, etc. in conditional rendering. In list rendering, we will discuss how to use the for loop.
Conditional Rendering
To begin with, let’s look at an example to explain the details of conditional rendering. Using conditional rendering, we want to output only when the condition is met, and we do this by using if, if-else, if-else-if, show, etc.
v-if
Example:

<html>
   <head>
      <title>VueJs Instance</title>
      <script type = "text/javascript" src = "js/vue.js"></script>
   </head>
   <body>
      <div id = "databinding">
         <button v-on:click = "showdata" v-bind:style = "styleobj">Click Here</button>
         <span style = "font-size:25px;"><b>{{show}}</b></span>
         <h1 v-if = "show">This is h1 tag</h1>
         <h2>This is h2 tag</h2>
      </div>
      <script type = "text/javascript">
         var vm = new Vue({
            el: '#databinding',
            data: {
               show: true,
               styleobj: {
                  backgroundColor: '#2196F3!important',
                  cursor: 'pointer',
                  padding: '8px 16px',
                  verticalAlign: 'middle',
               }
            },
            methods : {
               showdata : function() {
                  this.show = !this.show;
               }
            },
         });
      </script>
   </body>
</html>
Output: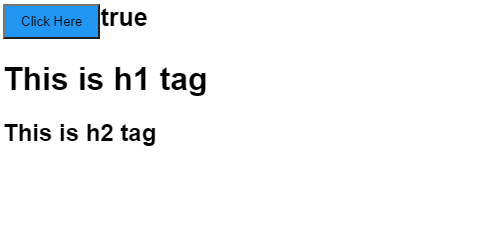
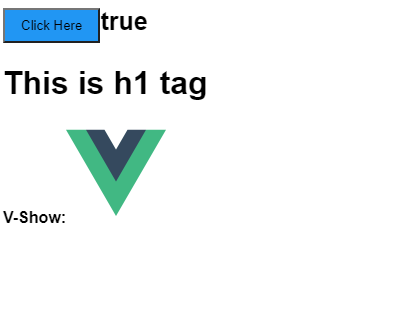
Our example above shows a button and two heading tags with the message.
On the click of the button, we are calling a method showdata, which toggles the value of the variable show. The variable show is declared and initialized to true.Upon clicking the button, the value of the variable show will change from true to false and vice versa.
The following code snippet shows how if is assigned to the h1 tag.
<button v-on:click = "showdata" v-bind:style = "styleobj">Click Here</button>
<h1 v-if = "show">This is h1 tag</h1>
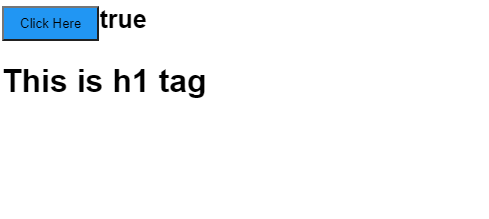
It will now check if the variable show is true and display the h1 tag if it is. As the value of the show variable changes to false when clicking the button, the h1 tag is not displayed in the browser. It appears only if the show variable is set to true.
Following is the display in the browser.
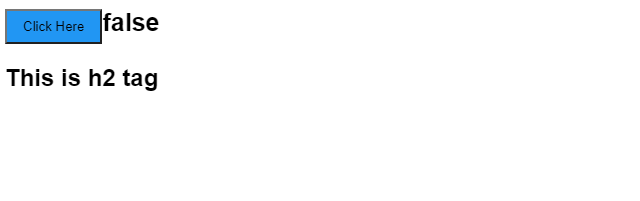
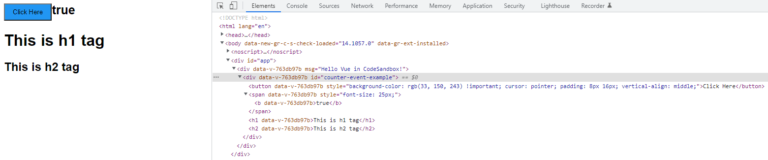
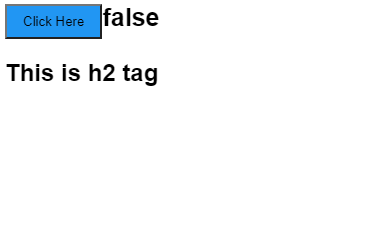
If we check in the browser, this is what we get when the show is false.

Whenever the variable show is set to false, the h1 tag is omitted from the DOM.
v-else
The second h1 tag in the following example contains v-else.Example:
<html>
<head>
<title>VueJs Instance</title>
<script type = "text/javascript" src = "js/vue.js"></script>
</head>
<body>
<div id = "databinding">
<button v-on:click = "showdata" v-bind:style = "styleobj">Click Here</button>
<span style = "font-size:25px;"><b>{{show}}</b></span>
<h1 v-if = "show">This is h1 tag</h1>
<h2 v-else>This is h2 tag</h2>
</div>
<script type = "text/javascript">
var vm = new Vue({
el: '#databinding',
data: {
show: true,
styleobj: {
backgroundColor: '#2196F3!important',
cursor: 'pointer',
padding: '8px 16px',
verticalAlign: 'middle',
}
},
methods : {
showdata : function() {
this.show = !this.show;
}
},
});
</script>
</body>
</html>The following code snippet adds v-else.
<h1 v-if = "show">This is h1 tag</h1>
<h2 v-else>This is h2 tag</h2>
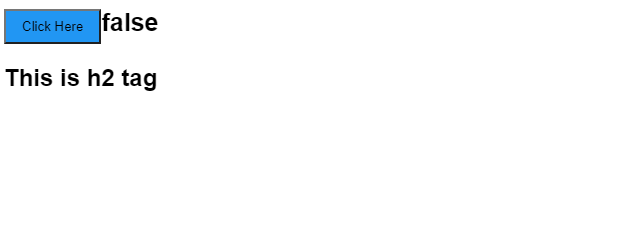
Now, if show is true “This is h1 tag” will be displayed, and if false “This is h2 tag” will be displayed. The result will appear in the browser.
When the show variable is true, the above display appears. Due to the addition of v-else, the second statement is not present. Upon clicking the button, the show variable will become false and the second statement will be displayed as shown in the screenshot below.
v-show
V-show behaves the same as V-if. It also displays or hides the elements according to the conditions it is assigned. When the condition is true, v-if adds the HTML element back to the DOM, but if it is false, v-if removes it. If the condition is false with display:none, v-show hides the element. In the case of a true condition, the element appears. It therefore remains in the dom permanently.
Example:

<html>
   <head>
      <title>VueJs Instance</title>
      <script type = "text/javascript" src = "js/vue.js"></script>
   </head>
   <body>
      <div id = "databinding">
         <button v-on:click = "showdata" v-bind:style = "styleobj">Click Here</button>
         <span style = "font-size:25px;"><b>{{show}}</b></span>
         <h1 v-if = "show">This is h1 tag</h1>
         <h2 v-else>This is h2 tag</h2>
         <div v-show = "show">
            <b>V-Show:</b>
            <img src = "images/img.jpg" width = "100" height = "100" />
         </div>
      </div>
      <script type = "text/javascript">
         var vm = new Vue({
            el: '#databinding',
            data: {
               show: true,
               styleobj: {
                  backgroundColor: '#2196F3!important',
                  cursor: 'pointer',
                  padding: '8px 16px',
                  verticalAlign: 'middle',
               }
            },
            methods : {
               showdata : function() {
                  this.show = !this.show;
               }
            },
         });
      </script>
   </body>
</html>
In the following code snippet, v-show is assigned to the HTML element.<div v-show = "show"><b>V-Show:</b><img src = "images/img.jpg" width = "100" height = "100" /></div>By using the same variable show and depending on whether it is true or false, the image is displayed in the browser.
Since the variable show is true, the image is as displayed in the screenshot above. Click the button to see the display.
The variable show is false, hence the image is hidden. If we inspect and see the element, the div along with the image is still a part of the DOM with the style property display: none as seen in the above screenshot.
List Rendering
v-for
Now let’s talk about list rendering with the v-for directive.
Example:
<html>
<head>
<title>VueJs Instance</title>
<script type = "text/javascript" src = "js/vue.js"></script>
</head>
<body>
<div id = "databinding">
<input type = "text" v-on:keyup.enter = "showinputvalue"
v-bind:style = "styleobj" placeholder = "Enter Fruits Names"/>
<h1 v-if = "items.length>0">Display Fruits Name</h1>
<ul>
<li v-for = "a in items">{{a}}</li>
</ul>
</div>
<script type = "text/javascript">
var vm = new Vue({
el: '#databinding',
data: {
items:[],
styleobj: {
width: "30%",
padding: "12px 20px",
margin: "8px 0",
boxSizing: "border-box"
}
},
methods : {
showinputvalue : function(event) {
this.items.push(event.target.value);
}
},
});
</script>
</body>
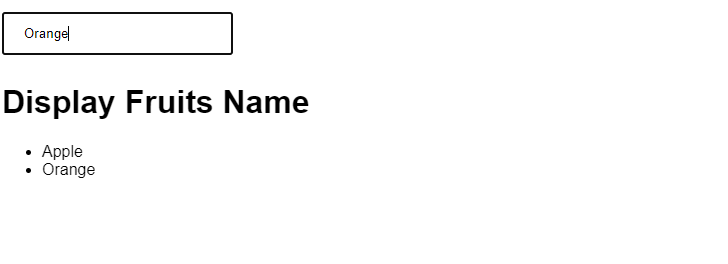
</html>It’s also declared as an array in variables. In methods, it’s defined as a method, showinputvalue, that takes names as input for the input box. The following code adds the fruits entered into the textbox to the array.
showinputvalue : function(event) {
   this.items.push(event.target.value);
}
As we can see, we have used v-for to display the fruits entered as follows. V-for allows us to iterate over the array values.
<ul>
   <li v-for = "a in items">{{a}}</li>
</ul>
In order to iterate over the array with a for loop, we need to apply v-for = “a in items”, where a holds the array values and displays them until all are displayed.
Output:
Following is the output in the browser.
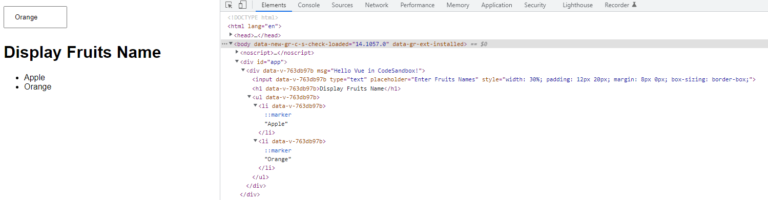
When inspecting the items, this is what we see in the browser. In the DOM, we don’t find any v-for directives for the li element. It displays the DOM without any VueJS directives.
<html>
   <head>
      <title>VueJs Instance</title>
      <script type = "text/javascript" src = "js/vue.js"></script>
   </head>
   <body>
      <div id = "databinding">
         <input type = "text" v-on:keyup.enter = "showinputvalue"
            v-bind:style = "styleobj" placeholder = "Enter Fruits Names"/>
         <h1 v-if = "items.length>0">Display Fruits Name</h1>
         <ul>
            <li v-for = "(a, index) in items">{{index}}--{{a}}</li>
         </ul>
      </div>
      <script type = "text/javascript">
         var vm = new Vue({
            el: '#databinding',
            data: {
               items:[],
               styleobj: {
                  width: "30%",
                  padding: "12px 20px",
                  margin: "8px 0",
                  boxSizing: "border-box"
               }
            },
            methods : {
               showinputvalue : function(event) {
                  this.items.push(event.target.value);
               }
            },
         });
      </script>
   </body>
</html>
To get the index, we’ve added one more variable in the bracket, as shown in the following code.<li v-for = "(a, index) in items">{{index}}--{{a}}</li>In (a, index), a is the value, and index is the key. The browser display will now look like the screenshot below. Since index is the key, any specific value can be displayed.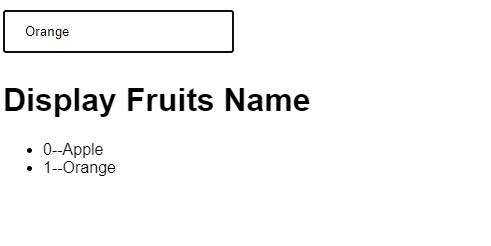
In the next section, you will learn about how to do cool animation and transition. How Directives and Routing work in VueJs.